Tag: Sustainable Fashion

  • Less But Better: A Guide to Capsule Wardrobes & Sustainable Style

    Less But Better: A Guide to Capsule Wardrobes & Sustainable Style

    In a world of overflowing closets and fast fashion trends that vanish faster than the seasons change, a quiet revolution is unfolding — not in the runways, but in the wardrobes of those who seek intention over impulse.

    Enter the capsule wardrobe: a symphony of simplicity, a celebration of sustainability, and a personal style philosophy that whispers, You already have enough — now make it extraordinary.

    Whether you’re dressing for school, work, or a weekend coffee date, this guide will show you how to build a wardrobe that’s light on waste and rich in possibility.


    What Is a Capsule Wardrobe?

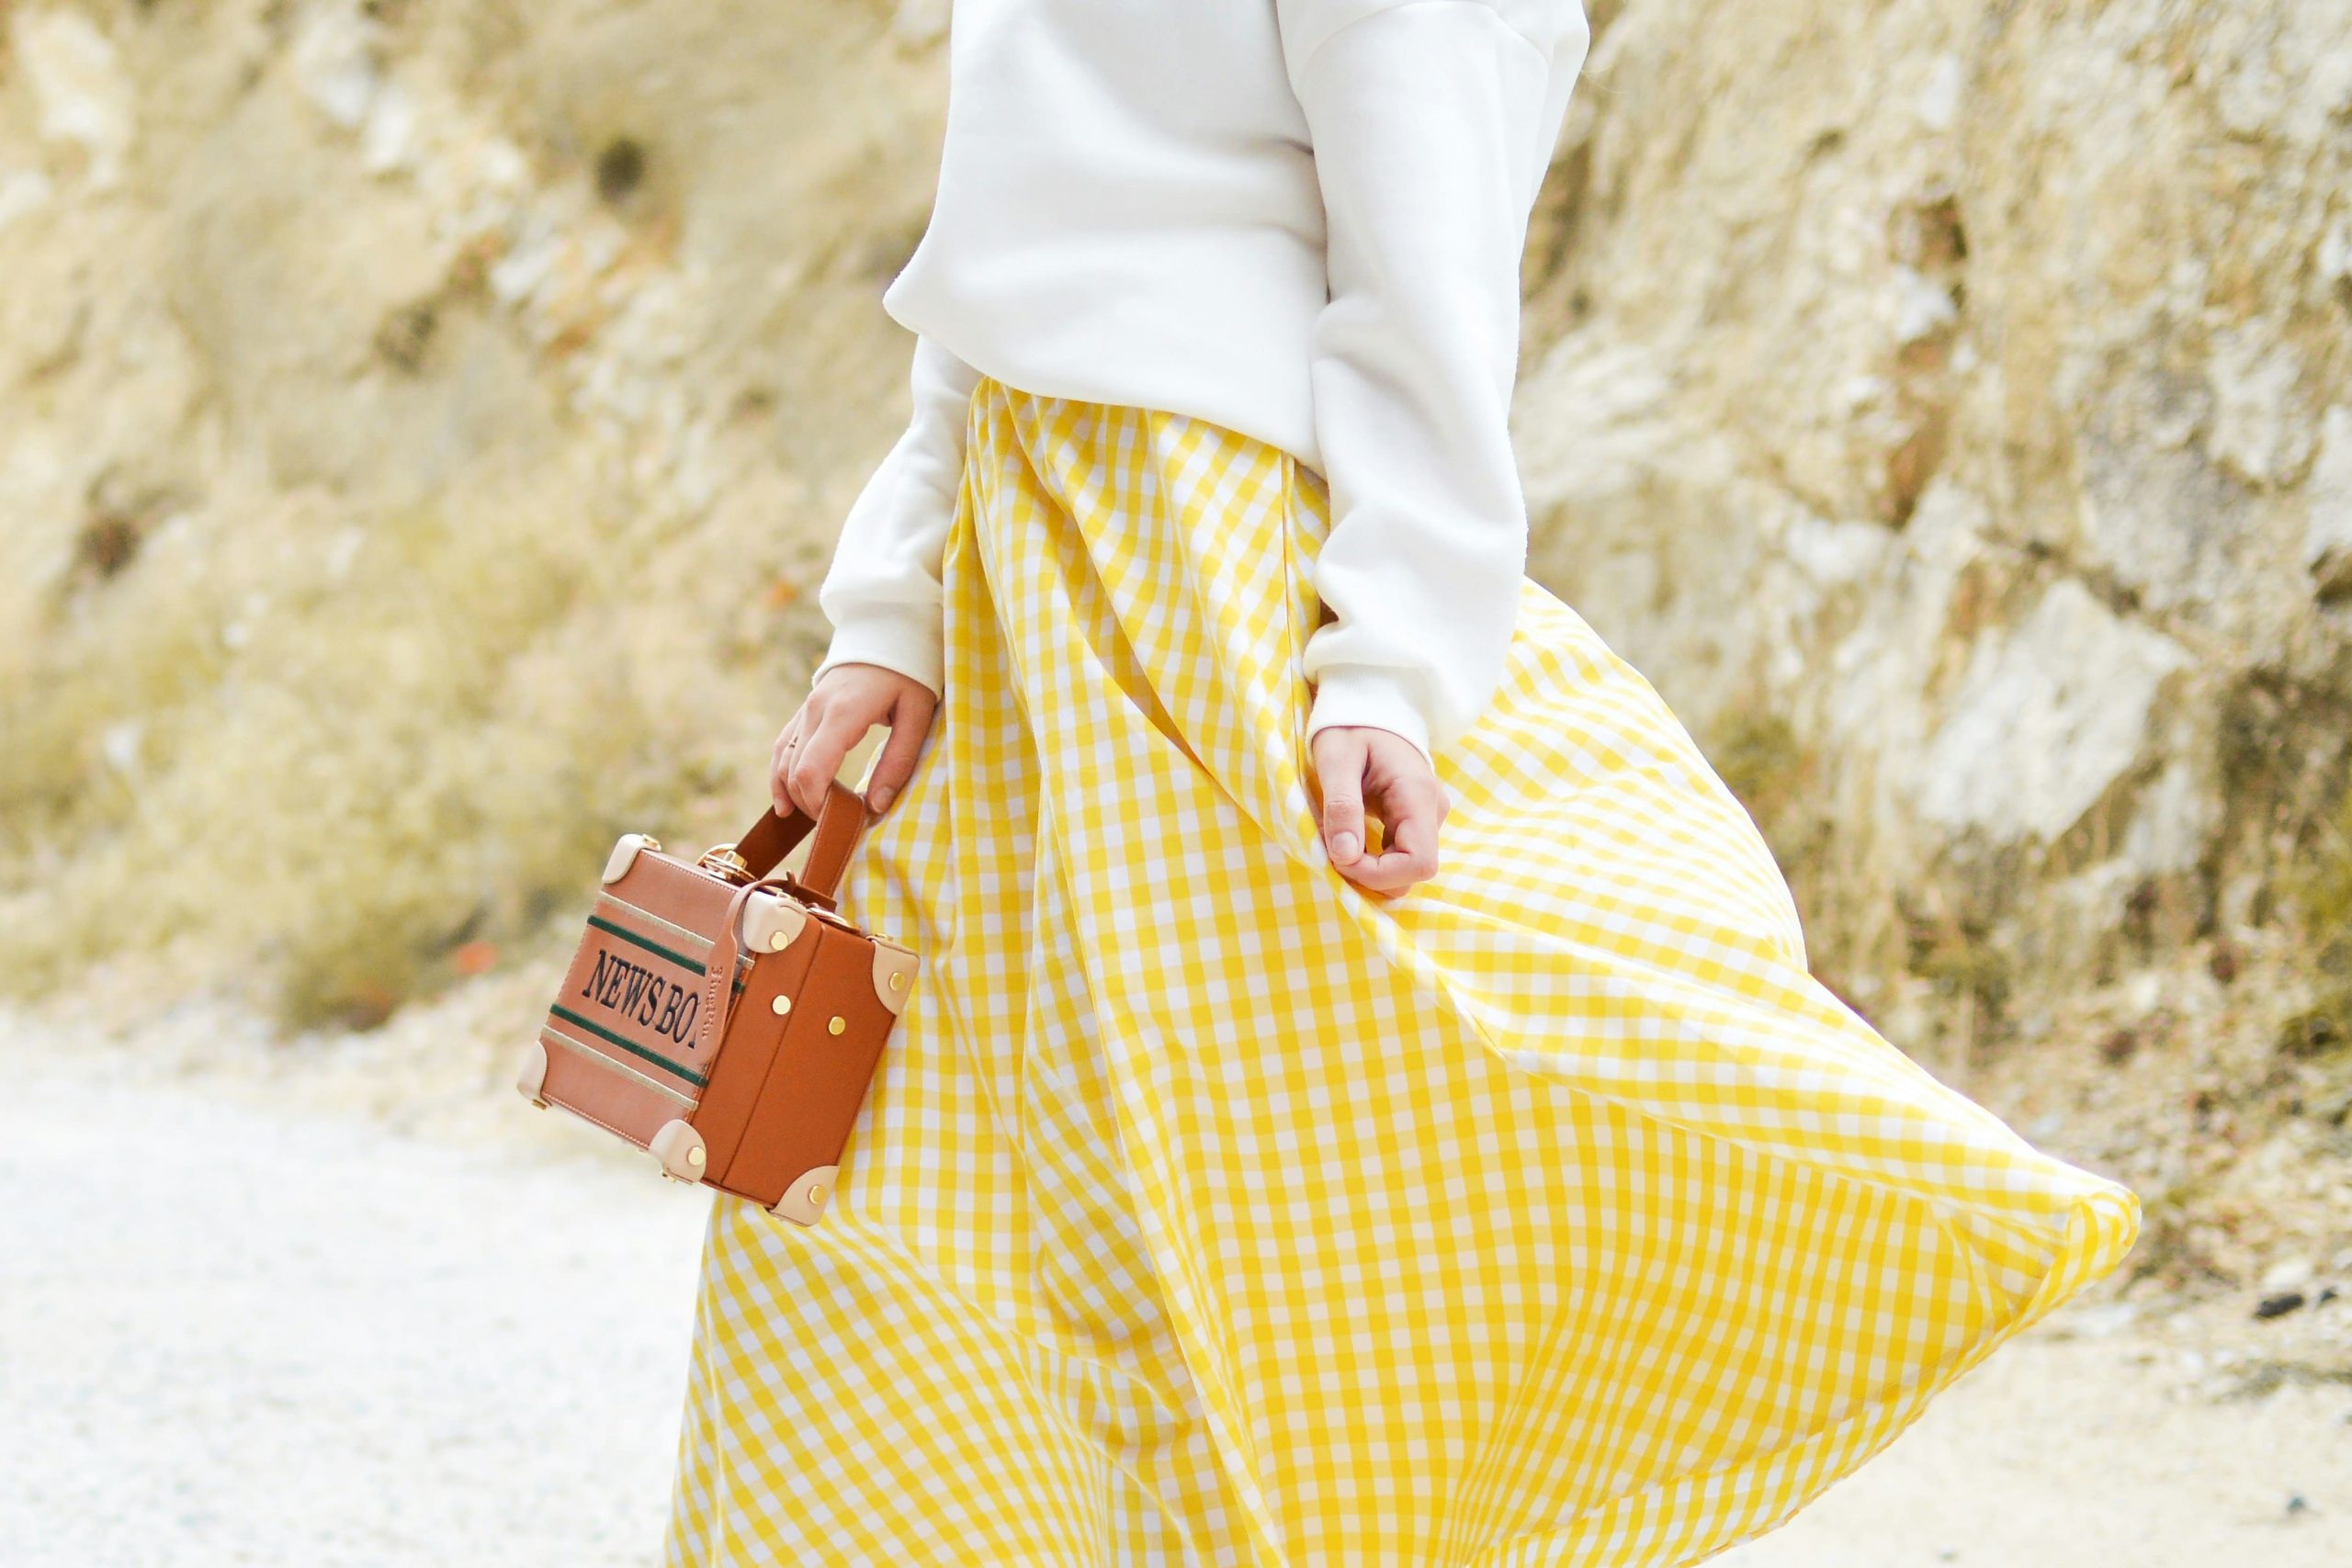
    A capsule wardrobe is a carefully curated collection of clothing you love, wear, and repeat — season after season. It’s about quality over quantity, timeless cuts over trendy clutter, and clothes that tell your story without shouting for attention.

    Typically, a capsule wardrobe includes 25–40 versatile pieces that can be mixed and matched to create dozens of outfits. Think of it as style with a soul — calm, conscious, and completely you.


    Why Choose a Capsule?

    Sustainability
    Fewer pieces mean less waste. It’s a gentle protest against the fast fashion industry and a choice that echoes in the environment — fewer dyes, less fabric waste, reduced carbon footprints.

    Simplicity
    No more frantic mornings wondering what to wear. Every piece has a purpose. Every outfit feels intentional.

    Savings
    By buying less, and buying better, you save in the long run — emotionally and financially. No more “wear-once” regrets.

    Self-discovery
    A capsule wardrobe helps you define your aesthetic. It’s not about trends — it’s about truth. What colors empower you? What fits make you feel free?


    How to Build Your Capsule Wardrobe

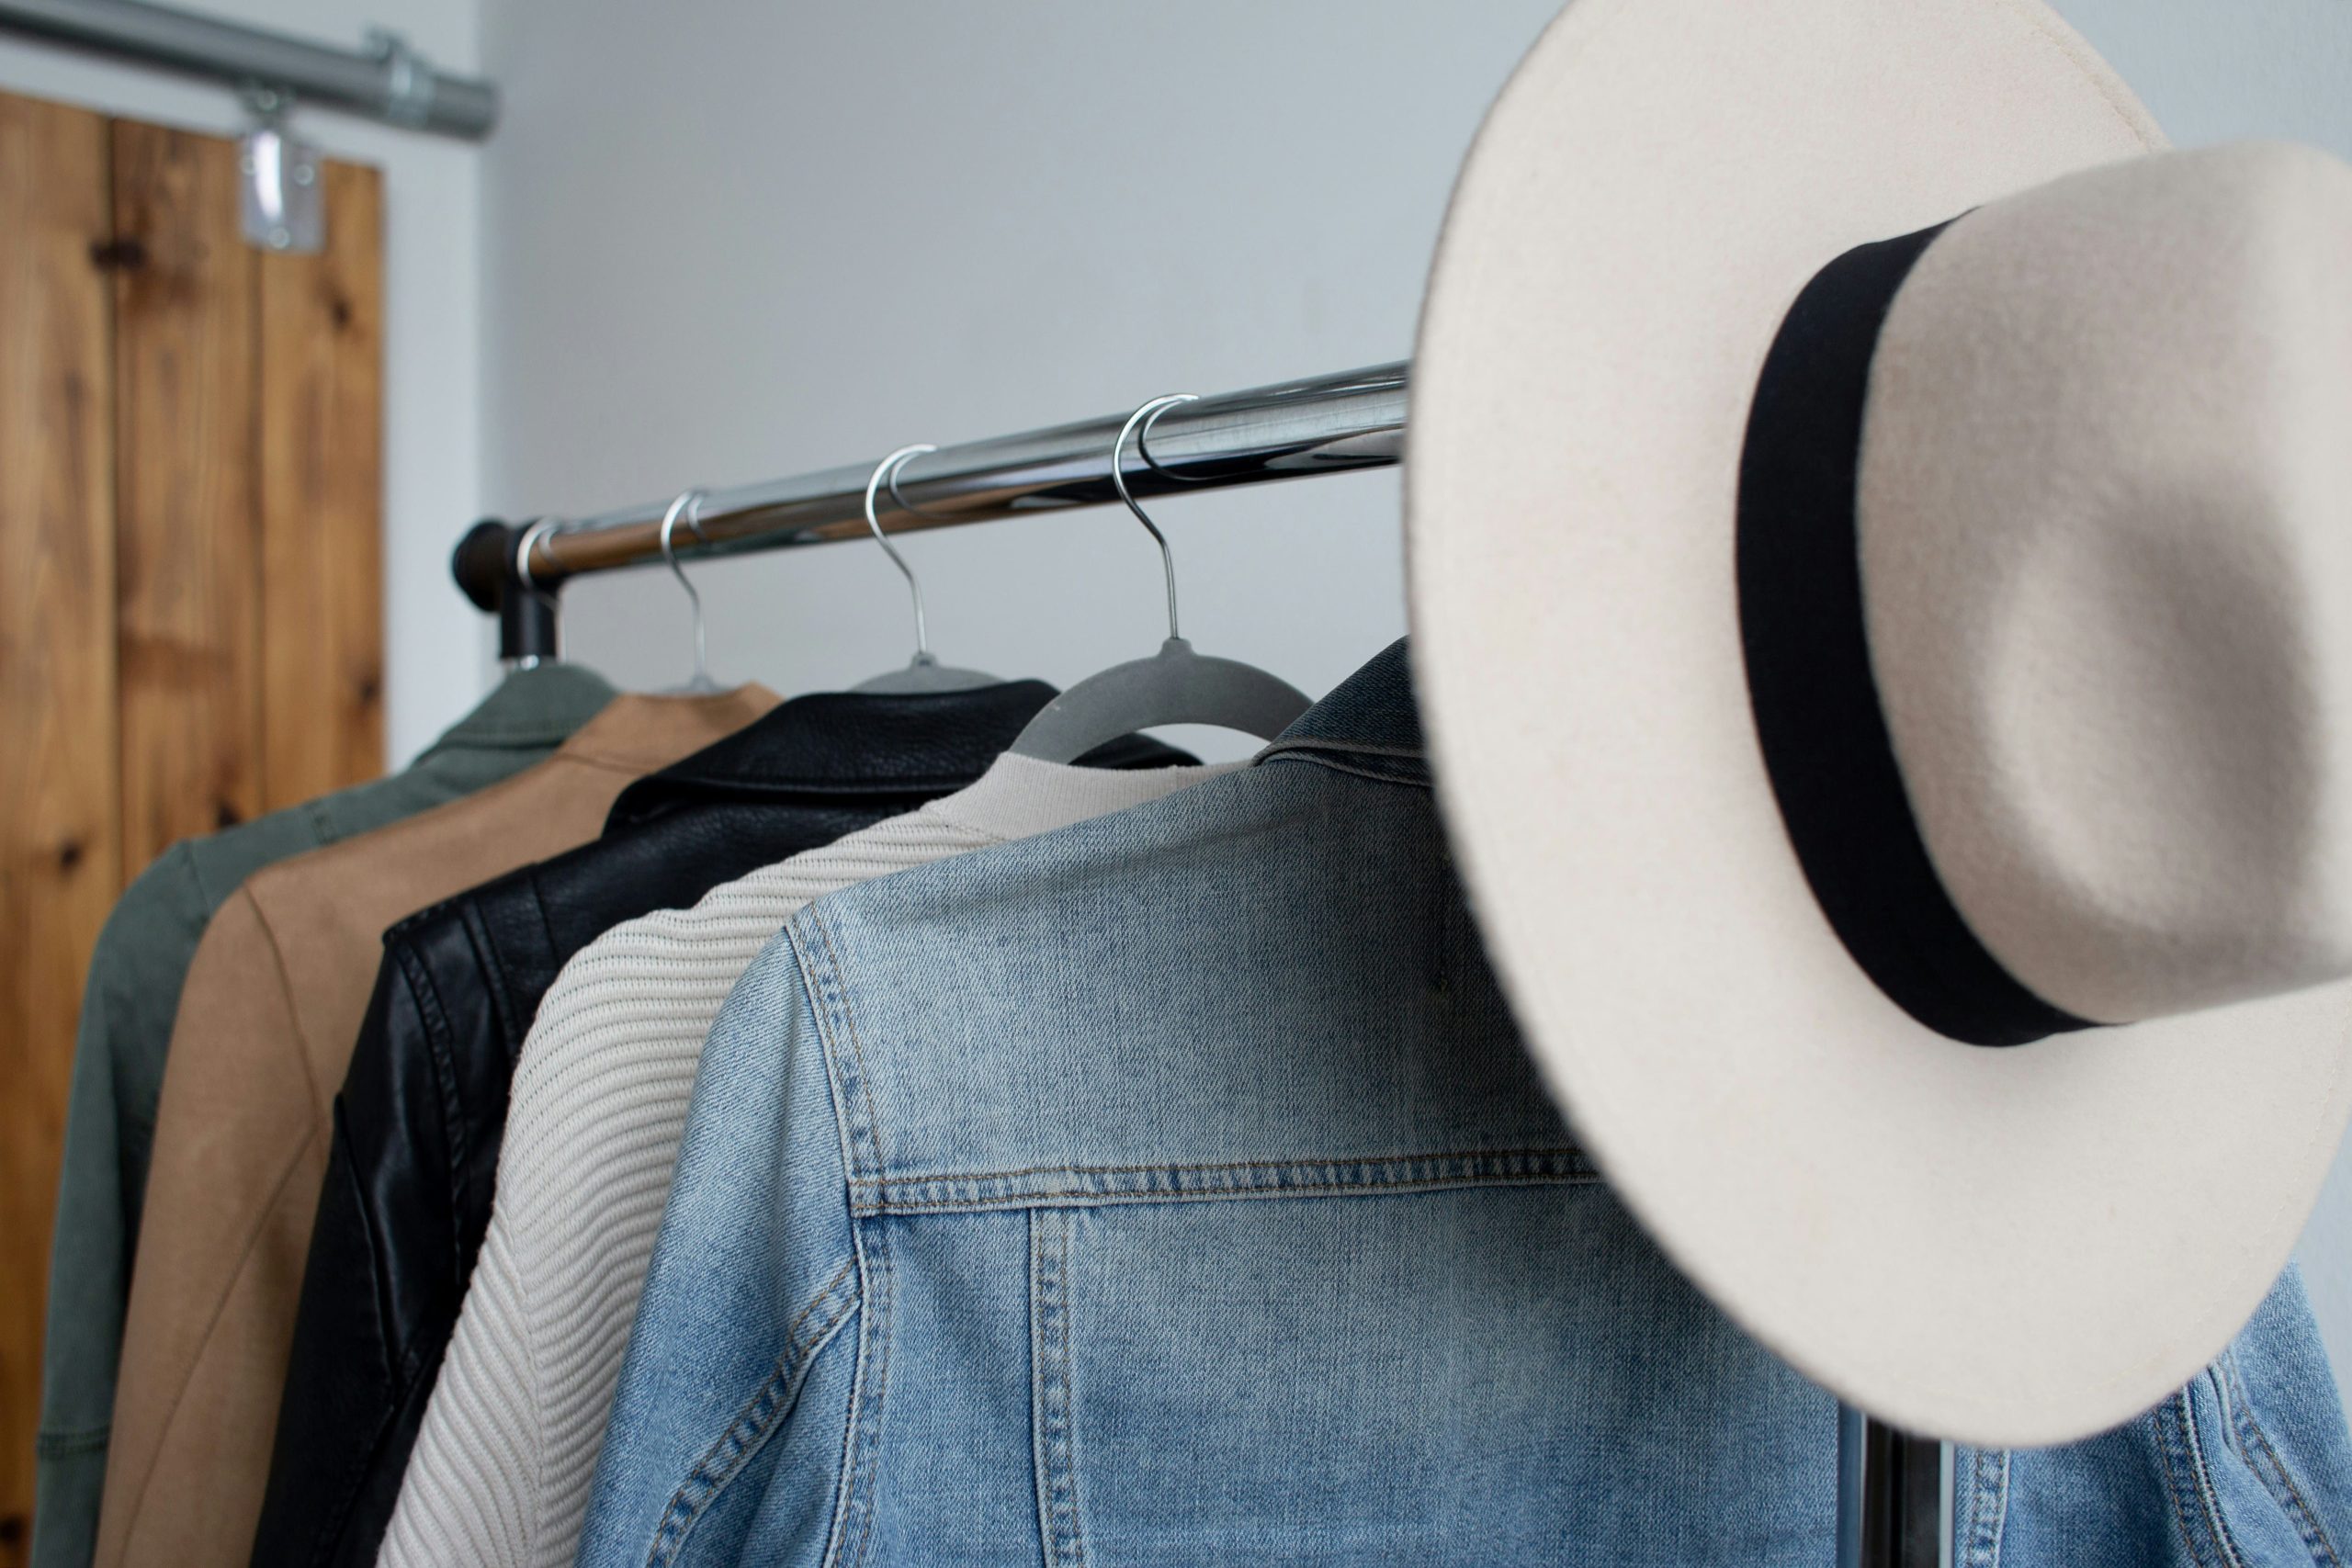
    1. Clear the Clutter
    Start by taking everything out of your closet. Yes, everything. Hold each item. Ask: Do I wear this? Do I love it? Does it fit my lifestyle? If the answer is no — release it. Let someone else love it.

    2. Define Your Palette
    Choose 2–3 neutral base colors (like black, white, beige, or navy), then sprinkle in 1–2 accent colors that bring joy. This creates harmony and allows effortless mixing.

    3. Choose Key Pieces
    Aim for pieces that layer easily and move between roles — a soft turtleneck that works for work and weekends, a tailored blazer that pairs with jeans and dresses, sneakers that feel as good as they look.

    Think:
    👕 6–8 tops
    👖 4–5 bottoms
    🧥 2–3 outerwear pieces
    👗 2–3 versatile dresses or jumpsuits
    👟 2–3 pairs of shoes
    🎒 1–2 statement accessories

    4. Embrace Seasonality
    Capsule wardrobes shift gently with the weather. Pack away what’s out of season and bring in cozy knits or breezy fabrics as needed — but resist the urge to overfill. Keep it curated.


    Style Isn’t Sacrificed — It’s Refined

    Capsule dressing is not about dressing less — it’s about dressing right. When your clothes reflect your values, when they align with who you are and who you want to be, confidence rises from the inside out.

    You’ll find joy in repetition. Power in restraint. And elegance in simplicity.


    Caring for Your Capsule

    Sustainable fashion thrives on care.

    • Wash with cold water to preserve fabrics and reduce energy
    • Repair, don’t replace — sew buttons, patch tears
    • Store intentionally, and treat your garments as companions, not consumables

    In Closing

    A capsule wardrobe is not just a style choice — it’s a lifestyle shift. It says:
    I will dress with care. I will own what I wear. I will choose less — and find more.

    So begin slowly. One item, one intention, one outfit at a time.

    Let your wardrobe be a reflection not just of your style — but of your story.

  • How to Make DIY Tie-Dye Shirts at Home (and Nail the Trends)

    How to Make DIY Tie-Dye Shirts at Home (and Nail the Trends)

    Tie-dye is back and trendier than ever, blending retro vibes with modern flair. Creating your own tie-dye shirts at home is fun, budget-friendly, and surprisingly easy. Plus, you can customize designs and colors to fit your personal style. Whether you’re going for bold swirls, subtle pastels, or trendy ombré effects, this guide will help you nail the tie-dye trends with step-by-step instructions.


    1. Gather Your Materials

    Here’s what you’ll need to get started:

    • Plain white or light-colored cotton shirts
    • Tie-dye kit or fabric dyes (available in craft stores or online)
    • Rubber bands
    • Plastic squeeze bottles (for liquid dye)
    • Plastic gloves (to protect your hands)
    • Plastic tablecloth or trash bags (to protect your workspace)
    • Ziplock bags or plastic wrap (for setting the dye)
    • Bucket or large sink (for rinsing)

    2. Prepping Your Shirts

    • Wash the Shirts: Start with clean, damp shirts. This helps the dye absorb more evenly.
    • Protect Your Workspace: Cover your table or floor with plastic to prevent stains.
    • Mix Your Dye: Follow the instructions on your tie-dye kit or dye bottles to prepare the colors.

    3. Choose a Tie-Dye Pattern

    Here are some popular patterns and how to create them:

    a. Classic Spiral

    1. Lay your shirt flat.
    2. Pinch the center of the shirt and twist it into a spiral shape.
    3. Secure the spiral with 3–4 rubber bands, creating pie-like sections.
    4. Apply different dye colors to each section.

    b. Bullseye

    1. Pinch the center of the shirt and pull the fabric upward to create a cone shape.
    2. Wrap rubber bands at intervals along the cone.
    3. Apply dye to each section between the bands.

    c. Crumple

    1. Scrunch the shirt into a loose ball.
    2. Secure with several rubber bands in random places.
    3. Apply dye sporadically over the shirt for a marble-like effect.

    d. Stripes

    1. Roll the shirt into a tube shape, starting at the bottom.
    2. Wrap rubber bands at regular intervals.
    3. Apply dye in alternating colors for horizontal or vertical stripes.

    e. Ombre (Gradient Effect)

    1. Dip the bottom of the shirt into a dye bath, letting it soak up the color gradually.
    2. Remove the shirt slowly to create a fade effect.

    4. Dyeing Your Shirt

    • Apply the Dye: Squeeze the dye onto the shirt using the squeeze bottles, saturating the fabric for bold colors or using less dye for softer tones.
    • Use Gloves: Wear gloves to avoid staining your hands.
    • Flip and Repeat: Turn the shirt over to apply dye to the back, ensuring full coverage.

    5. Let the Dye Set

    • Wrap It Up: Place the dyed shirt in a ziplock bag or wrap it in plastic to keep it damp.
    • Set Time: Let it sit for 6–8 hours (or longer for more vibrant results). Check your dye kit instructions for specific recommendations.

    6. Rinse and Wash

    1. Rinse Thoroughly: Rinse the shirt under cold water until the water runs clear. This prevents excess dye from bleeding later.
    2. Wash Separately: Wash the shirt alone in cold water with a gentle detergent.
    3. Air Dry: Hang your shirt to dry or use a dryer on a low setting.

    7. Tie-Dye Tips for Nailing the Trends

    • Experiment with Colors:
      • Pastel shades are great for soft, modern looks.
      • Neon colors make bold, eye-catching statements.
      • Stick to two or three complementary colors to avoid muddiness.
    • Try Different Fabrics:
      • Cotton works best, but blends like cotton-polyester can yield unique results.
    • Layer and Combine Techniques:
      • Mix patterns, like adding a crumple design over a spiral base.
      • Use bleach on dark shirts to create reverse tie-dye effects.

    8. Modern Tie-Dye Trends to Try

    • Monochrome Designs: Use shades of the same color for a chic, minimal look.
    • Reverse Tie-Dye: Start with a black or dark-colored shirt and use bleach to create patterns.
    • Geometric Patterns: Use tape or stencils to add structured designs.
    • Pastel Tie-Dye: Dilute your dye for soft, dreamy colors.

    9. Eco-Friendly Tie-Dye Options

    If you want to go green with your tie-dye:

    • Use natural dyes made from items like beet juice, turmeric, or spinach.
    • Reuse old shirts or fabric scraps to create new designs.

    10. Show Off Your Creations

    • Pair your tie-dye shirt with jeans or shorts for a casual, trendy look.
    • Share your creations on social media to inspire others. Use a fun backdrop for your photos to highlight the vibrant colors!
    • Gift your tie-dye projects to friends or family for a personalized touch.

    Final Thoughts

    Tie-dye is a fun and creative way to refresh your wardrobe while embracing one of today’s hottest trends. With these step-by-step instructions and modern techniques, you’ll not only master the art of tie-dye but also enjoy the process of creating one-of-a-kind pieces. So grab your supplies, get messy, and let your creativity shine!

  • Upcycling Basics: Turn Your Old Clothes into Stylish New Pieces

    Upcycling Basics: Turn Your Old Clothes into Stylish New Pieces

    Upcycling is a creative, sustainable way to breathe new life into your old clothes while reducing waste. Whether you’re transforming an oversized shirt into a trendy crop top or turning worn-out jeans into a chic tote bag, upcycling allows you to express your personal style while helping the environment. Here’s a step-by-step guide to upcycling your wardrobe and turning forgotten garments into fabulous, wearable pieces.


    1. Why Upcycle Your Clothes?

    a. Benefits of Upcycling:

    • Eco-Friendly: Reduces textile waste and the environmental impact of fashion.
    • Cost-Effective: Saves money by repurposing what you already own.
    • Creative Outlet: Lets you showcase your creativity and unique style.

    b. What You’ll Need:

    • Basic sewing supplies: needle, thread, scissors, and pins.
    • Sewing machine (optional but helpful).
    • Fabric glue or adhesive tape for no-sew projects.
    • Measuring tape and chalk for precision.
    • Accessories like buttons, zippers, patches, and trims for decoration.

    2. Assess Your Closet

    a. Choose Items to Upcycle

    • Look for clothes that no longer fit, are damaged, or feel outdated.
    • Examples:
      • Old T-shirts
      • Jeans with holes or worn knees
      • Dresses that are too long or oversized sweaters

    b. Identify Upcycling Potential

    • Ask yourself:
      • Can it be reshaped, shortened, or restyled?
      • Would adding embellishments make it wearable?
      • Could it serve a different purpose, like becoming an accessory?

    3. Easy Upcycling Ideas for Beginners

    a. Turn T-Shirts into Tote Bags

    1. Cut off the sleeves and neckline of a T-shirt.
    2. Sew or knot the bottom hem closed to form the base.
    3. Add reinforcements if needed for heavier loads.

    b. Crop Old Shirts

    1. Try on the shirt and mark your desired length with chalk.
    2. Cut straight across for a raw edge or hem it for a cleaner look.
    3. Pair it with high-waisted jeans or skirts for a trendy vibe.

    c. Patchwork Denim

    1. Use fabric scraps to cover holes or worn-out areas on jeans.
    2. Sew or glue patches in creative shapes or patterns.
    3. Mix and match colors for a playful touch.

    d. Revamp Sweaters into Accessories

    • Arm Warmers: Cut the sleeves of an old sweater and hem the edges.
    • Beanies: Use the body of the sweater to sew a custom-fit hat.

    4. Advanced Upcycling Projects

    a. Transform Dresses into Two-Piece Sets

    1. Cut a dress into a separate top and skirt.
    2. Add elastic to the skirt’s waistband for a snug fit.
    3. Hem both pieces for a polished finish.

    b. Turn Jeans into a Skirt

    1. Cut the jeans horizontally across the thigh.
    2. Remove the inseam and overlap the front and back panels.
    3. Sew the panels together and hem the bottom.

    c. Create a Denim Tote Bag

    1. Cut off the legs of old jeans and use the top portion as the bag’s body.
    2. Sew the bottom hem shut.
    3. Add straps using the remaining denim or another sturdy fabric.

    5. Decorative Upgrades

    a. Add Embellishments

    • Sew or glue on pearls, beads, or sequins for a glam look.
    • Use fabric paint or markers to create custom designs.

    b. Use Patches and Iron-Ons

    • Personalize jackets, jeans, or backpacks with trendy patches or logos.

    c. Add Lace or Trim

    • Sew lace onto the hems of shorts, skirts, or shirts for a romantic touch.

    d. Experiment with Tie-Dye or Fabric Dye

    • Revive faded clothes with vibrant tie-dye patterns or solid dye jobs.

    6. No-Sew Upcycling Projects

    a. Fringe T-Shirts

    1. Cut vertical strips along the bottom hem of a T-shirt.
    2. Knot the strips for a fringed effect.

    b. Knot Headbands

    1. Cut strips of fabric from old shirts or dresses.
    2. Twist or knot them into stylish headbands.

    c. DIY Wrap Skirts

    1. Use a scarf or square piece of fabric.
    2. Wrap it around your waist and secure with a knot or belt.

    7. Tips for Successful Upcycling

    1. Start Simple: Begin with small, manageable projects before moving on to complex designs.
    2. Plan Ahead: Sketch your ideas or use Pinterest for inspiration.
    3. Be Patient: It’s okay if your first attempt isn’t perfect—upcycling is a learning process.
    4. Experiment Freely: Don’t be afraid to mix materials, textures, or patterns.
    5. Preserve What Works: Keep labels, buttons, or unique features of the original garment for character.

    8. Showcase Your Creations

    • Social Media: Share your upcycled pieces on platforms like Instagram or Pinterest to inspire others.
    • Wardrobe Updates: Incorporate your upcycled pieces into everyday outfits to show off your creativity.
    • Gifts: Personalized, upcycled items make thoughtful and sustainable presents.

    9. Why Upcycling Matters

    a. Environmental Impact:

    • Reduces waste in landfills and lessens the demand for fast fashion.

    b. Creative Fulfillment:

    • Upcycling offers a rewarding sense of accomplishment and self-expression.

    c. Cost Savings:

    • Revamp your wardrobe without spending a fortune.

    Final Thoughts

    Upcycling old clothes is more than a creative hobby—it’s a sustainable lifestyle choice that lets you reinvent your wardrobe while reducing waste. From simple no-sew projects to advanced transformations, there’s no limit to what you can achieve with a little imagination. Dive into your closet, pick a piece, and start your upcycling adventure today!

  • How to Build a Capsule Wardrobe That Reflects You

    How to Build a Capsule Wardrobe That Reflects You

    In the age of fast fashion and ever-changing trends, building a wardrobe that stands the test of time can feel like an impossible task. Enter the capsule wardrobe—a collection of timeless, versatile pieces that you can mix and match to create countless outfits. A capsule wardrobe is not just a way to simplify your life; it’s a path to building a style that feels uniquely yours, while reducing clutter and minimizing environmental impact.

    If you’re looking to create a wardrobe that reflects your personal style and meets your everyday needs, building a capsule wardrobe is the perfect solution. In this guide, we’ll walk you through the steps of curating a capsule wardrobe that’s not only practical but also speaks to who you are, all while embracing sustainability and simplicity.

    1. Understand What a Capsule Wardrobe Is

    A capsule wardrobe is a thoughtfully curated collection of clothing that includes high-quality, timeless pieces that you can mix and match. It’s about quality over quantity and focusing on versatility. This wardrobe typically consists of around 30-40 items, including clothing, shoes, and accessories, depending on the season and your lifestyle needs.

    While the concept of a capsule wardrobe may seem minimalist, it’s far from boring. The idea is to choose pieces that fit well, make you feel confident, and can be styled in multiple ways, allowing you to express yourself authentically.

    2. Define Your Personal Style

    Before you start building your capsule wardrobe, it’s essential to understand your personal style. Your wardrobe should be a reflection of your identity, lifestyle, and the image you want to project. Are you drawn to classic, sophisticated pieces, or do you gravitate towards more bohemian, laid-back attire? The more you know about your style preferences, the easier it will be to curate a collection of clothes that makes you feel comfortable and confident.

    Tips for Defining Your Style:

    • Look to Your Current Wardrobe: Take stock of the clothes you already own. Which items do you wear most often? Which pieces make you feel the best when you wear them? This can give you clues about your preferences.
    • Create a Mood Board: Use Pinterest or a digital tool to gather images of outfits that inspire you. Over time, you’ll notice patterns in color, silhouette, and style that align with your tastes.
    • Consider Your Lifestyle: Your wardrobe should fit your day-to-day life. If you work in a corporate setting, you’ll want more professional items, but if you work remotely or lead a more casual lifestyle, you might favor comfortable, laid-back pieces.

    3. Choose Timeless, Versatile Pieces

    The heart of a capsule wardrobe is the selection of timeless, versatile clothing. These are pieces that won’t go out of style and can be worn in different combinations to suit various occasions. You should focus on classic shapes, neutral colors, and fabrics that stand the test of time.

    Essential Items for Your Capsule Wardrobe:

    • Tops: Think simple, elegant shirts, blouses, and sweaters in neutral shades like white, black, beige, or navy. These can easily be dressed up or down.
    • Bottoms: A well-fitted pair of jeans, tailored trousers, and perhaps a versatile skirt (like a pencil skirt or A-line) should form the foundation of your wardrobe.
    • Outerwear: A good jacket, trench coat, or classic blazer can elevate your look and keep you comfortable in cooler months.
    • Dresses: A timeless, flattering dress that you can wear for both casual and formal occasions is key. A little black dress (LBD) or a simple shift dress fits this role beautifully.
    • Shoes: Invest in a few pairs of shoes that work with multiple outfits. Think comfortable yet stylish flats, versatile heels, and a pair of boots that can be worn year-round.
    • Accessories: Scarves, belts, and simple jewelry can instantly transform an outfit. Keep it minimal yet impactful with pieces that match your overall aesthetic.

    4. Focus on Quality, Not Quantity

    In a capsule wardrobe, quality trumps quantity. Instead of filling your closet with fast fashion items that will quickly lose their shape and appeal, invest in fewer, higher-quality pieces that will last longer. Look for well-made clothes made from natural fibers like cotton, linen, wool, or silk, which tend to last longer and wear more beautifully than synthetic materials.

    How to Prioritize Quality:

    • Check the Fabric: Feel the fabric and consider how it will age. Natural fabrics like cotton and wool will usually last longer than synthetic options.
    • Pay Attention to Fit: Clothes that fit well are more flattering and versatile. Don’t compromise on fit when choosing key pieces.
    • Look for Durability: Check the stitching, zippers, and overall construction of an item to ensure it’s built to last.
    • Buy Less, Buy Better: Rather than constantly buying cheap, trend-driven items, invest in fewer but well-made pieces that you can mix and match.

    5. Choose a Color Palette That Reflects You

    Your color choices can speak volumes about your personality and style. When building your capsule wardrobe, select a color palette that complements your complexion and works well together. A well-chosen color scheme will make it easy to mix and match your pieces, creating endless outfit combinations.

    Tips for Choosing Your Color Palette:

    • Stick to Neutrals: Neutrals like black, white, navy, grey, and beige are incredibly versatile and form the backbone of any capsule wardrobe. They act as a solid foundation for your wardrobe.
    • Add Pops of Color: While neutrals are the foundation, it’s also important to choose a few accent colors that make you feel vibrant and alive. Whether it’s a rich burgundy, a soft blush, or a calming blue, these colors can give your wardrobe personality.
    • Think About Versatility: Choose colors that can be worn across multiple seasons and work well together. This way, every piece in your wardrobe can be mixed and matched.

    6. Embrace Seasonal Changes

    A capsule wardrobe isn’t about having the same pieces year-round. You can still build a wardrobe that reflects your style while adapting it to each season. Rotate items based on the weather, swapping in warmer layers for winter and lighter fabrics for summer.

    Seasonal Adjustments:

    • Winter: Add coats, scarves, gloves, and boots. Layer your outfits with sweaters and tights to keep warm.
    • Spring/Fall: Bring in lightweight jackets, cardigans, and breathable layers. Swap heavier fabrics for cotton and denim.
    • Summer: Keep it cool with short-sleeve tops, dresses, and sandals. Opt for fabrics like linen that are breathable and comfortable in the heat.

    7. Edit and Reassess Regularly

    A capsule wardrobe is a dynamic collection. As your style evolves, so should your wardrobe. Edit and reassess your capsule wardrobe regularly to ensure it still reflects who you are. Let go of pieces that no longer serve you and replace them with ones that feel right for your current lifestyle.

    How to Edit Your Wardrobe:

    • Take Stock Annually: Every season, go through your wardrobe and assess what you wear the most, what you no longer need, and what you could replace with a more versatile item.
    • Focus on Wearability: If a piece doesn’t get worn often or doesn’t feel like “you,” it’s time to let it go. Remember, the goal of a capsule wardrobe is to have pieces you love and wear consistently.

    Conclusion:

    Building a capsule wardrobe is an exercise in self-expression, simplicity, and sustainability. By curating pieces that align with your personal style and focusing on quality, versatility, and timeless appeal, you can create a wardrobe that feels uniquely yours. This process not only helps reduce clutter and make getting dressed easier, but it also promotes mindful consumption and a more sustainable approach to fashion.

    Remember, a capsule wardrobe isn’t about following strict rules—it’s about making your wardrobe work for you, reflecting your personality, and feeling empowered every time you get dressed. With thoughtful choices, you’ll have a wardrobe that’s a true reflection of who you are, season after season.

  • Top 7 Sustainable Fashion Brands You Need to Know in 2024

    Top 7 Sustainable Fashion Brands You Need to Know in 2024

    Sustainability is no longer just a buzzword—it’s a movement reshaping the fashion industry. As consumers grow more conscious of their choices, brands are stepping up to create clothing that’s both stylish and planet-friendly. Here are the top seven sustainable fashion brands leading the charge in 2024, proving that ethics and aesthetics can go hand in hand.

    1. Patagonia: The Trailblazer

    Patagonia has been a pioneer in sustainable fashion long before it became mainstream. Known for its durable outdoor gear, the brand focuses on using recycled materials and ethical manufacturing practices. Patagonia’s commitment to environmental activism is unparalleled, with initiatives like the “Worn Wear” program, which promotes repairing and reusing clothing.

    Why It Stands Out:

    • Uses 100% renewable energy in U.S. operations.
    • Donates 1% of sales to environmental causes.

    2. Eileen Fisher: Timeless Elegance

    Eileen Fisher is synonymous with minimalist, timeless designs that prioritize quality over quantity. The brand emphasizes circular fashion with programs like “Renew,” where old garments are refurbished and resold, and “Waste No More,” which transforms discarded textiles into new creations.

    Why It Stands Out:

    • Focuses on organic and regenerative fibers.
    • Offers take-back programs to extend garment lifespans.

    3. Stella McCartney: High-Fashion Sustainability

    A pioneer in cruelty-free luxury, Stella McCartney has redefined what it means to be a sustainable high-fashion brand. From vegan leather to biodegradable materials, the brand consistently pushes boundaries while maintaining its chic aesthetic.

    Why It Stands Out:

    • Innovates with cutting-edge sustainable fabrics.
    • Actively campaigns for environmental awareness.

    4. Allbirds: The Comfort Revolution

    Allbirds has revolutionized footwear with its eco-friendly designs made from materials like merino wool, eucalyptus fiber, and sugarcane. The brand’s carbon-neutral approach and focus on transparency make it a favorite among eco-conscious shoppers.

    Why It Stands Out:

    • Uses natural, renewable materials.
    • Provides a carbon footprint for every product.

    5. Pangaia: Science Meets Style

    Pangaia merges innovation and sustainability to create vibrant, modern essentials. Known for its use of bio-based materials, recycled fibers, and plant-based dyes, the brand’s mission is to design a better future for both people and the planet.

    Why It Stands Out:

    • Develops cutting-edge materials like seaweed fiber.
    • Partners with environmental organizations to drive impact.

    6. Reformation: Chic and Conscious

    Reformation is proof that sustainable fashion can be effortlessly stylish. The brand tracks its environmental footprint for every garment, offering transparency about water usage, waste, and CO2 emissions. With its trend-driven designs, Reformation appeals to the modern, eco-aware shopper.

    Why It Stands Out:

    • Focuses on deadstock and upcycled fabrics.
    • Operates with a carbon-neutral supply chain.

    7. Veja: The Sneaker Icon

    Veja has reimagined sneakers with sustainability at its core. From organic cotton to wild rubber sourced from the Amazon, the brand’s materials and fair trade practices have set a new standard for footwear.

    Why It Stands Out:

    • Prioritizes ethical supply chains.
    • Champions transparency in production.

    Why Sustainable Fashion Matters

    Fast fashion’s impact on the environment is undeniable, with vast amounts of waste, water pollution, and greenhouse gas emissions. By choosing sustainable brands, consumers can reduce their ecological footprint and support ethical labor practices. Each purchase is a step toward a more responsible fashion industry.

    Making the Shift

    Adopting sustainable fashion doesn’t mean compromising on style. These brands prove that you can look good while doing good. Whether you’re drawn to Patagonia’s durability, Stella McCartney’s luxury, or Reformation’s trendy designs, there’s a sustainable option for every wardrobe.

    Let 2024 be the year you embrace fashion that respects both people and the planet.

  • DIY Distressed Jeans: Step-by-Step Guide to the Perfect Ripped Look

    DIY Distressed Jeans: Step-by-Step Guide to the Perfect Ripped Look

    Distressed jeans are the ultimate blend of edgy and effortless style, but buying them brand-new can cost a small fortune. The good news? You don’t need to spend big bucks for that perfectly ripped, worn-in look—you can create it yourself at home!

    Whether you want subtle frays or bold knee slashes, this step-by-step guide will help you transform any old pair of jeans into DIY distressed perfection. So, grab your tools, unleash your creativity, and let’s get ripping!


    What You’ll Need

    Before you begin, gather these essentials:

    • A pair of old jeans (light-washed or vintage styles work best)
    • Sharp scissors or a utility knife
    • Tweezers
    • Sandpaper or a pumice stone
    • Chalk or a fabric marker
    • Cardboard or a magazine (to protect the other side of your jeans)

    Step 1: Choose the Right Pair of Jeans

    Start with a pair of jeans you’re ready to transform. Distressing works best on jeans made of 100% cotton, as they’ll fray and tear naturally. Lighter washes tend to give off that vintage, lived-in vibe, but darker jeans can look sleek and modern when distressed.

    Pro Tip: If you’re nervous about experimenting, try practicing on an old pair of jeans first.


    Step 2: Plan Your Rips and Tears

    Lay your jeans flat on a table and think about where you want the rips to go. Popular areas include:

    • Knees: Large, bold tears are a statement look.
    • Thighs: Subtle frays and small slashes add texture.
    • Pockets: Distressed edges can give a vintage feel.

    Use chalk or a fabric marker to lightly outline where you want the rips and frays to be. For a natural look, avoid making the marks perfectly symmetrical—real wear-and-tear isn’t uniform.


    Step 3: Start Sanding for a Worn Look

    Before cutting, soften the fabric where you want the distressing to appear. This creates a natural worn-in effect.

    1. Place a piece of cardboard or a magazine inside the jeans to protect the back layer.
    2. Use sandpaper or a pumice stone to rub back and forth over the fabric. Focus on areas you want to look naturally faded or frayed.
    3. Keep sanding until you see small white threads and the denim begins to thin.

    Tip: Pay extra attention to the knees, thighs, and edges of the pockets for a realistic worn-out look.


    Step 4: Create Your Rips and Frays

    Now comes the fun part—creating the rips!

    1. Use sharp scissors or a utility knife to carefully cut horizontal slits across the fabric where you want the rips. Start small—you can always make the holes bigger later.
    2. To create that frayed look, use tweezers to pull out the vertical blue threads from the slits. Leave the white horizontal threads behind—these give distressed jeans their classic look.

    Pro Tip: For big, bold rips at the knees, cut two horizontal slits about 2-3 inches apart. Pull out the blue threads in between for a frayed, open-knee effect.


    Step 5: Add Finishing Touches

    Once you’ve made your rips and frays, it’s time to add the finishing touches to perfect your jeans.

    • Smaller Frays: Use scissors to scrape small sections of fabric to create tiny, distressed spots.
    • Edges and Pockets: Rough up the edges of the back pockets, cuffs, or belt loops with sandpaper for a more authentic, worn look.
    • More Texture: For added detail, rub sandpaper lightly over the seams and other areas of the jeans to create natural fading.

    Step 6: Wash and Wear

    Once you’re happy with the distressing, throw your jeans into the washing machine. Washing helps loosen any loose threads and gives the rips a softer, more natural finish.

    • Wash on a cold cycle and air dry to preserve your handiwork.
    • If needed, trim any loose or overly long threads for a cleaner look.

    Pro Tip: The more you wear and wash your jeans, the better the rips and frays will look over time!


    Styling Your DIY Distressed Jeans

    Now that your jeans are perfectly distressed, here are some ideas to style them:

    • Casual Cool: Pair your jeans with a tucked-in white tee, sneakers, and layered necklaces.
    • Street Style: Add a leather jacket, graphic tee, and combat boots for an edgy vibe.
    • Chic and Polished: Dress up your jeans with a flowy blouse, ankle boots, and a statement belt.

    Why DIY?

    Creating your own distressed jeans is about more than just saving money. It’s about making something unique that reflects your personal style. Plus, it’s sustainable—giving old jeans a second life instead of throwing them away.

    With just a little creativity and some basic tools, you’ll have a pair of ripped jeans that are one of a kind—just like you.

  • 10 Easy DIY Fashion Hacks to Transform Your Old Clothes

    10 Easy DIY Fashion Hacks to Transform Your Old Clothes

    Is your closet overflowing with clothes you don’t wear anymore? Instead of tossing them out, why not give them a brand-new life? With a little creativity, your old jeans, t-shirts, and dresses can become fresh, trendy pieces you’ll love to wear again.

    These 10 easy DIY fashion hacks are simple, fun, and perfect for anyone looking to upgrade their wardrobe on a budget. Grab your scissors, glue, and a splash of imagination—let’s transform your old clothes into something fabulous!


    1. Turn Old Jeans Into Stylish Shorts

    Those ripped, faded, or too-short jeans sitting in the back of your closet? Turn them into a cute pair of summer shorts!

    How to Do It:

    1. Measure and mark where you’d like to cut. Leave a little extra length if you want to roll the hem.
    2. Use sharp scissors to cut off the legs.
    3. For a distressed look, fray the edges with sandpaper or a cheese grater.
    4. Add patches, embroidery, or studs for extra flair!

    Tip: Pair your new shorts with a tucked-in tank or graphic tee for a laid-back summer vibe.


    2. Make a No-Sew Crop Top from a T-Shirt

    Too many old t-shirts? Give them a fresh, trendy twist by turning them into crop tops—no sewing required!

    How to Do It:

    1. Lay your t-shirt flat and cut straight across the bottom to your desired crop length.
    2. Cut a small slit on each side of the shirt (about 2 inches).
    3. Tie the bottom edges in small knots for a cute, finished look.

    Style Tip: Layer it over a high-waisted skirt or shorts for an effortlessly cool outfit.


    3. Add Lace to Your Old Denim Jacket

    Give a boring denim jacket a romantic twist with some pretty lace details.

    How to Do It:

    1. Choose lace fabric or old doilies.
    2. Use fabric glue or stitch the lace onto the back panel, sleeves, or pockets of the jacket.
    3. Let it dry completely, and voilà—your jacket just got a stunning upgrade!

    Style Tip: Lace details pair perfectly with dresses or edgy black jeans for a mix of soft and bold.


    4. Create a Tie-Dye Masterpiece

    Tie-dye is colorful, fun, and back in style! Turn old plain t-shirts, hoodies, or dresses into tie-dye masterpieces.

    How to Do It:

    1. Use rubber bands to tie sections of your fabric tightly.
    2. Apply fabric dye in fun colors to each section.
    3. Let the fabric sit for a few hours, rinse in cold water, and dry.

    Pro Tip: Experiment with different patterns, like spirals, stripes, or ombré effects.


    5. Upgrade Shoes with Glitter or Paint

    Old shoes can sparkle again with a little glitter or paint. It’s a simple way to give worn-out sneakers or flats a fabulous makeover.

    How to Do It:

    1. Clean the shoes thoroughly.
    2. For glitter: Apply fabric glue to the area you want to sparkle and sprinkle on glitter. Let it dry and seal with clear glue or spray.
    3. For paint: Use acrylic paint to add patterns, polka dots, or stripes.

    Style Tip: Customize your shoes to match your favorite outfits or add a splash of color to your look.


    6. Patch Up Ripped Jeans with Fun Fabrics

    Instead of tossing out ripped jeans, turn those holes into a style statement with colorful patches.

    How to Do It:

    1. Cut fun fabric pieces (like floral, plaid, or even old bandanas).
    2. Glue or sew the fabric behind the ripped areas of your jeans.
    3. Add more patches for a bold, DIY vibe.

    Style Tip: Pair patched jeans with a simple white tee to let the patches shine.


    7. Turn a Scarf Into a Chic Halter Top

    Got a scarf gathering dust? With a few folds and ties, you can create a beautiful, flowy halter top.

    How to Do It:

    1. Fold the scarf into a triangle.
    2. Tie the two ends around your neck and the bottom corner around your back.
    3. Adjust the fit to make sure it’s secure.

    Style Tip: Pair with high-waisted jeans or a maxi skirt for a beachy, boho summer look.


    8. Add a Pocket to a Plain Tee

    Breathe life into plain t-shirts by adding a colorful or patterned pocket.

    How to Do It:

    1. Cut a pocket shape from patterned fabric (like florals or stripes).
    2. Glue or sew it onto the front of the shirt.
    3. For extra fun, decorate the pocket with beads, sequins, or embroidery.

    Style Tip: A bright pocket is perfect for pairing with denim shorts or layering under an open flannel shirt.


    9. Turn an Old Sweater into Cozy Mittens

    Repurpose an old sweater into soft, cozy mittens that are perfect for winter.

    How to Do It:

    1. Place your hand on the sweater sleeve and trace an outline for the mitten shape.
    2. Cut out two pieces of fabric per mitten and stitch or glue the edges together.
    3. Flip them inside out for a clean, finished look.

    Pro Tip: Add buttons or embroidery for a cute, customized touch.


    10. Create a Statement Belt from an Old Scarf

    A beautiful scarf can double as a statement belt that elevates your outfits.

    How to Do It:

    1. Fold or roll the scarf into a long strip.
    2. Wrap it around your waist like a belt.
    3. Tie a knot or bow at the front, back, or side.

    Style Tip: Use a brightly patterned scarf to add a pop of color to a simple dress or jumpsuit.


    Transform Your Wardrobe, Transform Your Style

    DIY fashion hacks are about more than saving clothes—they’re about unleashing your creativity and turning forgotten pieces into something uniquely you. Whether you’re adding lace to a denim jacket, tie-dying a t-shirt, or cutting jeans into shorts, these simple tricks can completely transform your wardrobe.

    So, grab your scissors, fabrics, and imagination. Your closet is about to become your ultimate creative playground!