Blog

  • Add a Personal Touch: How to Embroider Your Denim Jackets

    Add a Personal Touch: How to Embroider Your Denim Jackets

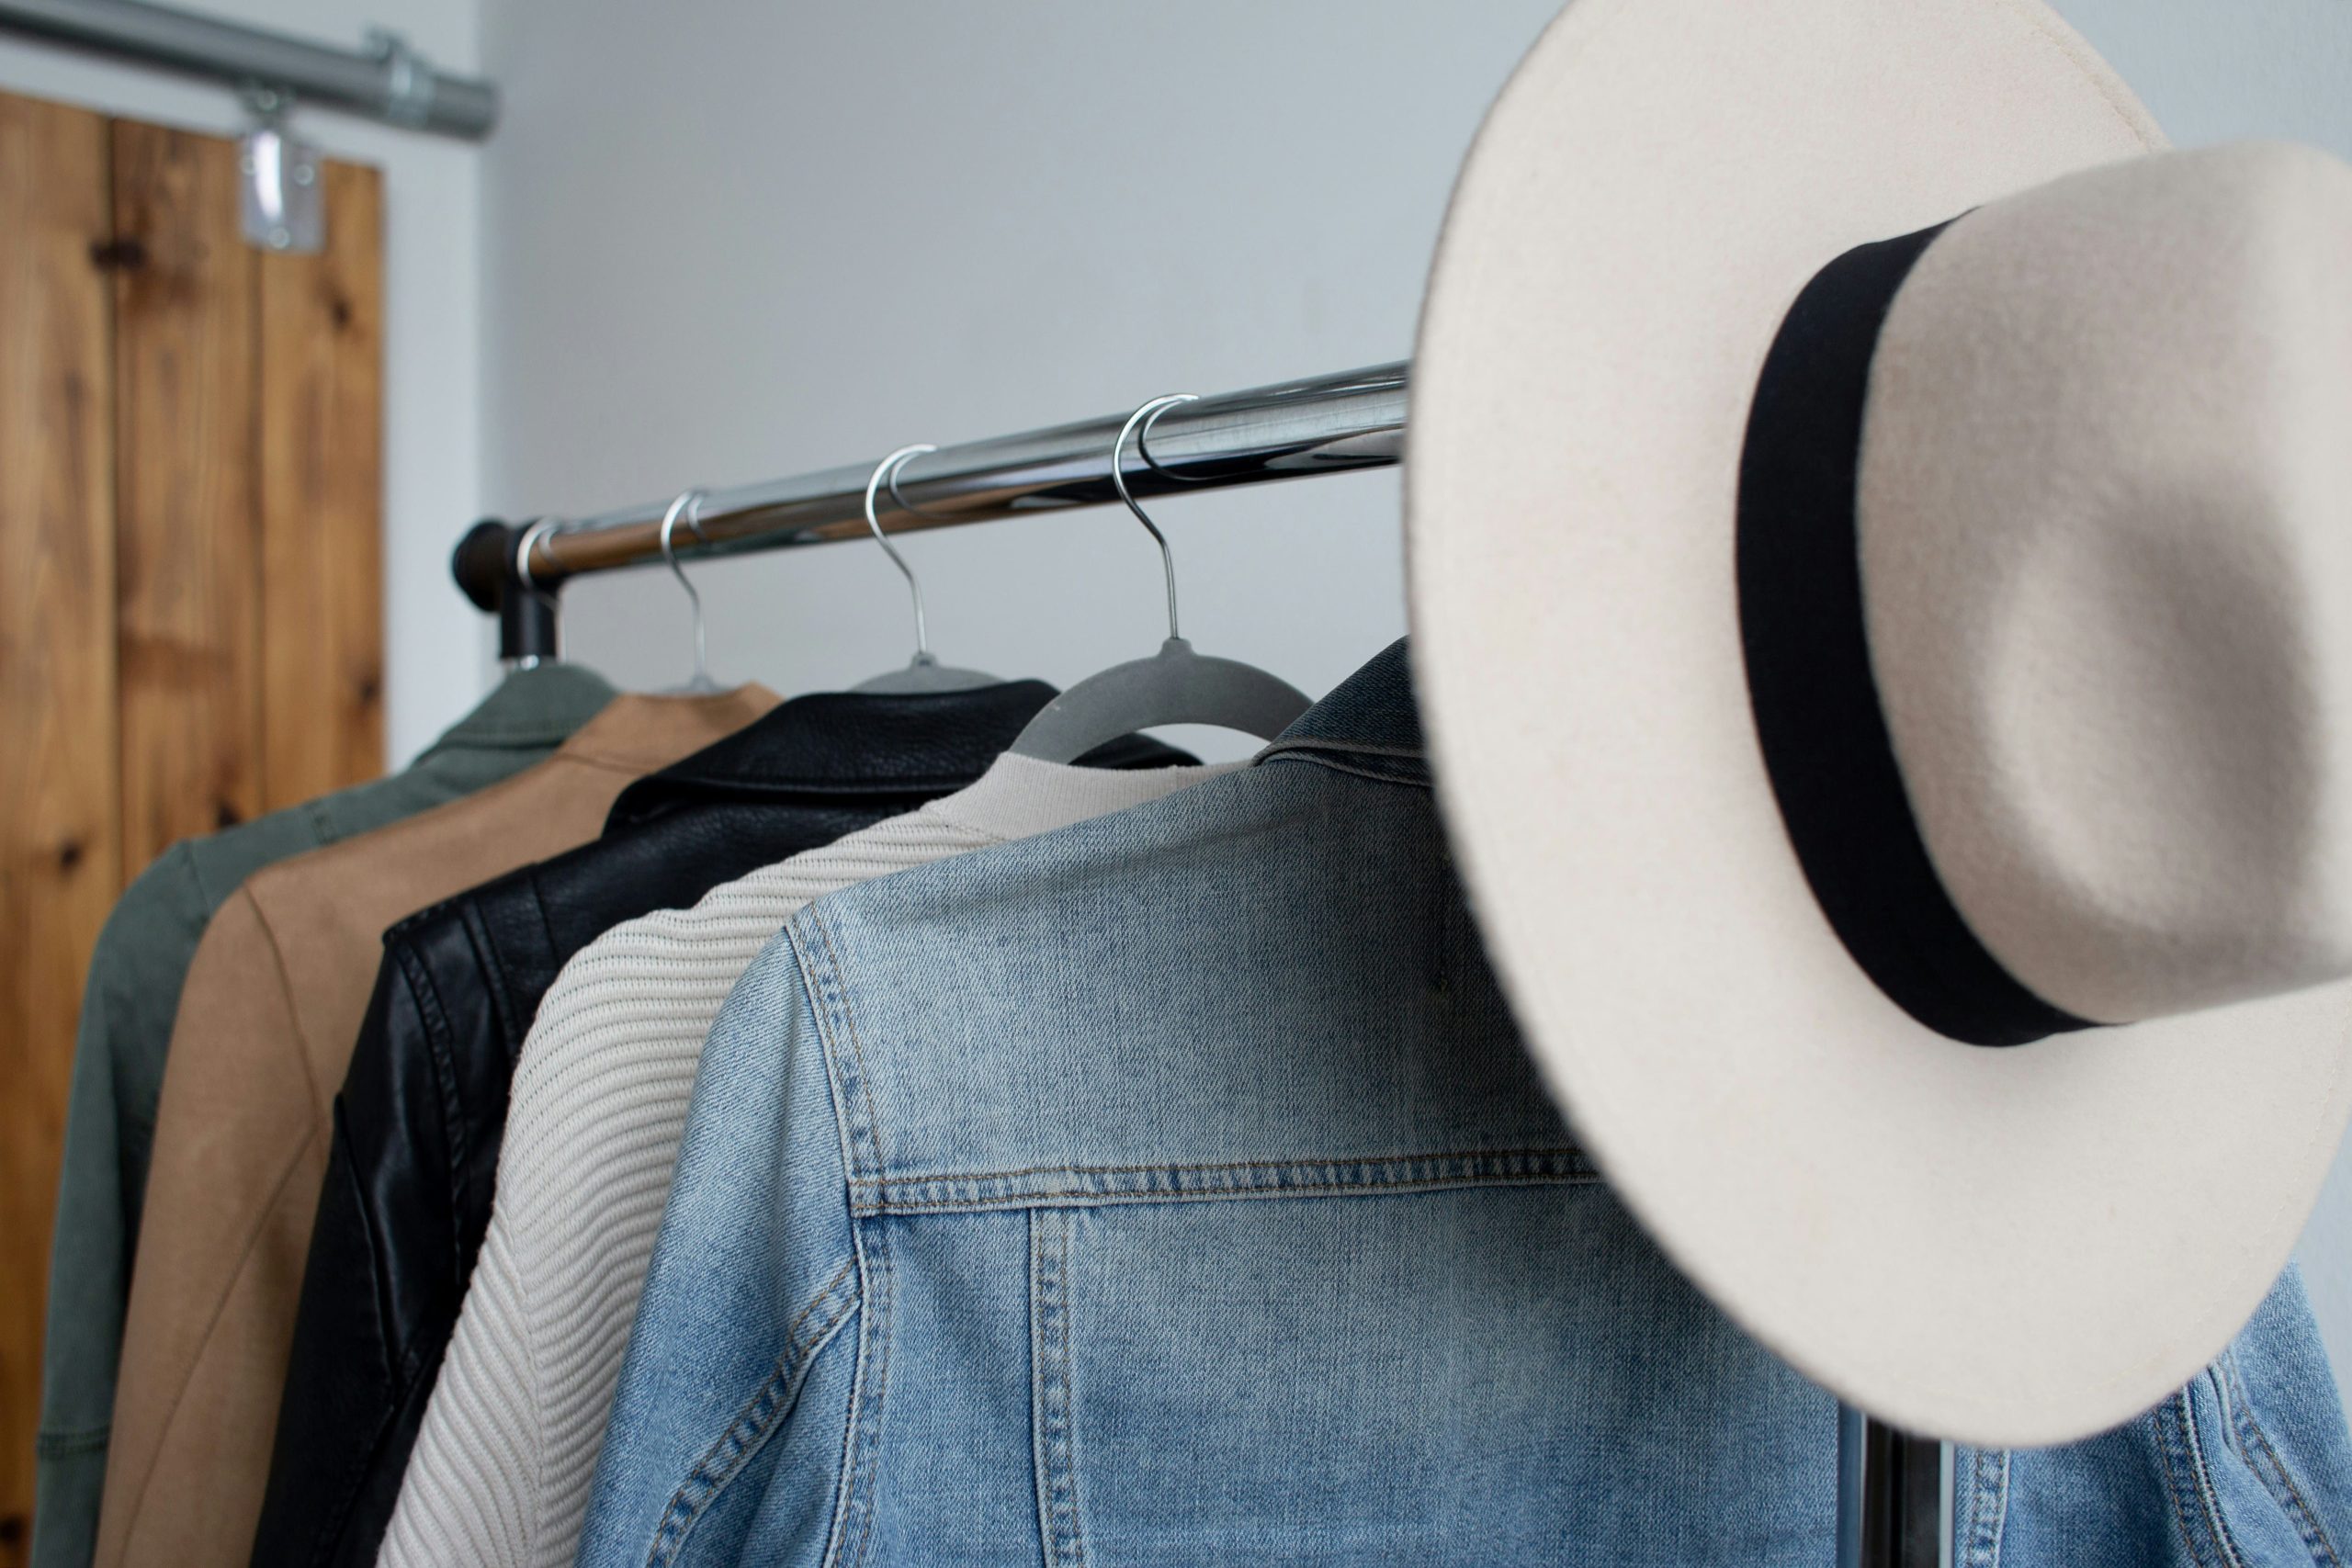
    Denim jackets are timeless wardrobe staples, but why settle for plain when you can make yours uniquely you? Embroidery is the perfect way to add a splash of personality, turning your favorite jacket into a wearable piece of art. Whether you’re stitching delicate florals, bold geometric patterns, or quirky designs, embroidery lets you showcase your creativity and style.

    Ready to transform your denim jacket? Here’s your step-by-step guide to mastering embroidery and creating a jacket that’s truly one of a kind.


    Why Embroider Your Denim Jacket?

    • Show Your Personality: Create designs that reflect your mood, interests, or style.
    • Sustainable Fashion: Revamp an old jacket instead of buying something new.
    • Make It Yours: No one else will have a jacket like yours!

    Embroidery isn’t just fun—it’s also a meaningful way to embrace creativity and sustainability.


    What You’ll Need

    Before you get started, gather these essentials:

    1. A denim jacket (preferably one with minimal embellishments to let your embroidery shine).
    2. Embroidery floss (choose colors that complement your design).
    3. Embroidery needles (make sure they’re sharp enough to pierce denim).
    4. Embroidery hoop (optional, but it helps keep the fabric taut).
    5. Fabric chalk or a washable pen (for sketching your design).
    6. Scissors (small and sharp for precise cutting).
    7. Thimble (optional, for protecting your fingers when working with thick fabric).

    Step 1: Choose Your Design

    Your design sets the tone for your jacket, so pick something that excites you!

    Ideas for Inspiration:

    • Nature-Inspired: Flowers, leaves, or birds.
    • Pop Culture: A favorite quote, character, or symbol.
    • Geometric Patterns: Triangles, stars, or abstract shapes.
    • Personal Symbols: Your initials, zodiac sign, or a meaningful motif.

    Tip: Start small if you’re new to embroidery. A single flower or a simple design is easier to handle than a complex pattern.


    Step 2: Sketch Your Design

    Once you’ve decided on a design, sketch it onto your jacket with fabric chalk or a washable pen.

    Tips for Sketching:

    • Keep your design proportional to the area you’re embroidering. For example, a small design works well on the chest pocket, while a larger design fits the back panel.
    • Test your design on paper first to perfect the details.
    • Lightly mark any key outlines to guide your stitching.

    Step 3: Prepare Your Jacket and Thread

    Prepare the Jacket:

    • If using an embroidery hoop, position it over the area you’ll be stitching and tighten it to keep the fabric taut.
    • If you’re skipping the hoop, hold the fabric firmly while stitching.

    Prepare the Thread:

    • Cut a length of embroidery floss (about 18-24 inches is ideal).
    • Separate the floss into strands (most floss comes in six-strand bundles; for denim, use 2-3 strands for a clean look).
    • Thread the needle and tie a small knot at the end of the floss.

    Step 4: Learn Basic Embroidery Stitches

    You don’t need to be an expert to create stunning embroidery. Here are three beginner-friendly stitches to try:

    1. Backstitch:
      • Perfect for outlines and straight lines.
      • How to Do It: Pull the needle up through the fabric, take a small stitch backward, then repeat, overlapping slightly.
    2. Satin Stitch:
      • Great for filling in shapes.
      • How to Do It: Stitch back and forth, closely spaced, to create a smooth, solid fill.
    3. French Knot:
      • Adds texture for dots or small accents.
      • How to Do It: Wrap the thread around the needle once or twice, insert the needle close to the starting point, and pull tight.

    Step 5: Start Stitching

    Now it’s time to bring your design to life!

    Tips for Success:

    • Work slowly and carefully to ensure even stitches.
    • Tension is key—don’t pull too tight, or the fabric may pucker.
    • Take breaks if your hands get tired; denim can be tough to work with.

    Step 6: Secure and Trim

    When you’ve finished your design, secure the thread by tying a knot on the inside of the jacket. Trim any excess thread for a neat finish.

    Pro Tip: Use a fabric sealant or clear nail polish on the knots for extra durability.


    Step 7: Flaunt Your Creation

    Congratulations—you’ve transformed your denim jacket into a one-of-a-kind masterpiece! Wear it proudly to show off your creativity and style.

    Where to Show It Off:

    • Pair it with jeans for a double-denim statement.
    • Layer it over a dress for a casual yet chic vibe.
    • Use it as your signature piece for festivals, meetups, or casual outings.

    Extra Tips for Embroidery Success

    • Start Simple: If you’re new to embroidery, stick to small, manageable designs.
    • Practice First: Test your stitches on scrap fabric before working on your jacket.
    • Experiment with Colors: Mix and match thread colors for added depth and vibrancy.
    • Add Layers: Combine embroidery with patches, pins, or fabric paint for an even bolder look.

    Why Embroidery is Worth It

    • Eco-Friendly: Upcycling your jacket reduces waste and supports sustainable fashion.
    • Budget-Friendly: Embroidery supplies are affordable, and the results are priceless.
    • Creative Expression: Every stitch tells a story—your story.

    The Final Note: Stitch Your Style

    Embroidery is more than just a craft—it’s a way to connect with your creativity, celebrate your individuality, and make your clothes uniquely yours. With a little patience and practice, you’ll have a denim jacket that’s as bold, beautiful, and timeless as you are.

    So grab your needle, pick your design, and start stitching your way to a trend-setting masterpiece!

    What will you create next?

  • The Perfect Date Night Outfit: Style Ideas for Every Vibe

    The Perfect Date Night Outfit: Style Ideas for Every Vibe

    Whether it’s a romantic dinner, a casual coffee date, or a fun night out, dressing for a date can feel both exciting and overwhelming. The key is to match your outfit to the vibe of the evening while still letting your personality shine. The perfect date night outfit isn’t about following rigid rules—it’s about feeling confident, comfortable, and fabulous.

    Here are style ideas for every vibe to help you nail your date night look and make an unforgettable impression.


    1. Romantic Dinner: Elegance with a Twist

    For a candlelit dinner or upscale restaurant, go for a look that’s classic, polished, and a touch sultry.

    • For Her:
      • A sleek midi dress in a solid color or soft floral print.
      • Strappy heels and a clutch bag to elevate the look.
      • Add sparkle with delicate jewelry—think gold hoops or a dainty bracelet.
    • For Him:
      • A tailored blazer over a crisp button-down shirt.
      • Slim-fit trousers and leather loafers for a sharp finish.
      • Add personality with a patterned pocket square or watch.

    Pro Tip: Stick to timeless pieces in flattering cuts for a look that never goes out of style.


    2. Casual Coffee Date: Effortlessly Cool

    A low-key coffee date calls for a relaxed yet stylish outfit that feels approachable and authentic.

    • For Her:
      • A pair of well-fitted jeans paired with a tucked-in blouse or a cropped sweater.
      • White sneakers or ankle boots for a comfy, chic vibe.
      • Add a touch of personality with a statement bag or fun earrings.
    • For Him:
      • A casual button-down shirt (plaid or chambray works well) with dark-wash jeans.
      • Stylish sneakers or desert boots to keep it laid-back.
      • Throw on a lightweight jacket or cardigan for extra style points.

    Pro Tip: Keep it simple and comfortable—your outfit should reflect your everyday charm.


    3. Movie Night: Relaxed and Cozy

    A movie date is all about comfort, but that doesn’t mean sacrificing style. Opt for pieces that are cozy yet put-together.

    • For Her:
      • High-waisted leggings or relaxed-fit jeans paired with an oversized knit sweater.
      • Slip-on loafers or clean sneakers for a casual touch.
      • Add a scarf or crossbody bag to pull the look together.
    • For Him:
      • A soft crewneck sweater with slim-fit joggers or casual jeans.
      • Comfortable sneakers for a chill vibe.
      • A denim jacket for layering if it’s chilly.

    Pro Tip: Go for soft fabrics and relaxed fits to feel cozy during the show.


    4. Outdoor Adventure: Functional and Fashionable

    For a date that involves hiking, a picnic, or exploring, prioritize practicality with a touch of flair.

    • For Her:
      • High-waisted leggings or cargo pants paired with a moisture-wicking top.
      • A stylish windbreaker or fleece jacket for layering.
      • Functional footwear, like hiking boots or trail sneakers.
    • For Him:
      • A performance t-shirt with rugged cargo shorts or pants.
      • A lightweight jacket or vest for layering.
      • Comfortable and durable hiking shoes.

    Pro Tip: Choose pieces that are weather-appropriate and easy to move in, but don’t forget to accessorize with a cool cap or sunglasses.


    5. Night Out Dancing: Bold and Glamorous

    A night on the dance floor is your chance to go all out with bold, statement-making looks.

    • For Her:
      • A sequin mini dress or a sleek jumpsuit with cut-out details.
      • Heeled ankle boots or strappy sandals for dancing the night away.
      • Amp up the glam with bold lipstick and sparkling accessories.
    • For Him:
      • A slim-fit button-down shirt in a bold color or print.
      • Black jeans or tailored trousers for a polished yet edgy look.
      • Sleek leather boots or minimalist sneakers for style and comfort.

    Pro Tip: Prioritize comfortable shoes so you can dance without worry.


    6. Art Gallery or Cultural Outing: Artsy Chic

    For a date with a creative vibe, choose an outfit that feels sophisticated and unique.

    • For Her:
      • Wide-leg trousers paired with a fitted turtleneck or blouse.
      • Loafers or low-heeled mules for an artistic edge.
      • A statement accessory, like bold earrings or a vintage scarf.
    • For Him:
      • A tailored blazer over a turtleneck or slim-fit sweater.
      • Dark trousers or chinos with leather brogues.
      • Add character with a patterned pocket square or unique socks.

    Pro Tip: Play with textures like velvet or silk to add depth to your outfit.


    7. Beach Date: Breezy and Relaxed

    For a seaside date, embrace light, flowy pieces that are both comfortable and stylish.

    • For Her:
      • A breezy maxi dress or a matching set of a crop top and wide-leg pants.
      • Sandals or espadrilles for easy walking on the sand.
      • A wide-brimmed hat and oversized sunglasses for sun protection and style.
    • For Him:
      • A linen shirt with rolled-up sleeves paired with chino shorts.
      • Slip-on loafers or sandals for a relaxed vibe.
      • Add a straw hat for a touch of flair.

    Pro Tip: Choose light fabrics like cotton or linen to stay cool and comfortable.


    8. At-Home Date: Cozy and Cute

    For a relaxed evening at home, keep it casual while still looking cute.

    • For Her:
      • Soft joggers or leggings paired with an oversized cardigan or hoodie.
      • Fuzzy socks or slippers for ultimate comfort.
      • Add a touch of charm with a messy bun and simple jewelry.
    • For Him:
      • Joggers or sweatpants with a fitted long-sleeve tee or hoodie.
      • Cozy socks and a warm blanket for extra charm.

    Pro Tip: Comfort is key—choose pieces that feel soft and relaxed without being overly casual.


    Final Thoughts

    The perfect date night outfit is about more than just looking good—it’s about feeling confident and comfortable in your own skin. Whether your vibe is elegant and sophisticated or casual and cool, let your outfit reflect your personality and the unique energy you bring to the date.

    Remember, the best accessory you can wear is confidence. So, step out (or stay in) with your head high and enjoy every moment!

  • Rewear, Repair, Repeat: Giving Your Clothes a Longer Life

    Rewear, Repair, Repeat: Giving Your Clothes a Longer Life

    In today’s fast-paced world of ever-changing trends, clothes often feel disposable—worn a few times before being tossed aside for something new. But here’s a powerful truth: the most sustainable wardrobe isn’t one filled with brand-new eco-friendly pieces, but one where you rewear, repair, and repeat what you already own.

    Not only does extending the life of your clothes help the planet, but it’s also a creative, rewarding, and cost-saving way to approach fashion. Ready to give your wardrobe a fresh lease on life? Let’s explore how to make the most of what you already have.


    1. Rewear: Celebrate Your Favorite Pieces

    Wearing your clothes multiple times isn’t just practical—it’s stylish, sustainable, and a statement of confidence.

    How to Rewear with Style:

    • Mix and Match: Pair your favorite top with different bottoms, layer dresses over jeans, or style sweaters in new ways.
    • Accessorize Boldly: Scarves, hats, and jewelry can completely transform an outfit you’ve worn before.
    • Embrace Monochrome: Build chic, single-color looks by combining similar shades from your wardrobe.

    Why It Matters: Rewearing reduces waste and overconsumption, and it challenges the idea that you need something new for every occasion.

    Pro Tip: Look to style icons who rewear their outfits—like royals and celebrities—for inspiration!


    2. Repair: Bring Old Favorites Back to Life

    A small hole, loose button, or frayed hem doesn’t mean your clothes are done for. Repairing clothes is an empowering way to keep them in your wardrobe longer.

    Simple Repairs You Can Try:

    • Fix Loose Buttons: Use a needle and thread to reattach buttons securely.
    • Patch Holes: Sew on a patch, or use iron-on fabric for a quick fix.
    • Hems and Seams: Use hemming tape for quick fixes or hand-stitch loose threads.
    • Zipper Troubles: Replace broken zippers or use a wax candle to smooth stuck zippers.

    Why It Matters: Repairing clothes saves money and resources, and it gives you a sense of accomplishment.

    Pro Tip: Not confident in your sewing skills? Many tailors offer affordable repair services, and online tutorials can help you learn the basics.


    3. Repeat: Build a Timeless, Versatile Wardrobe

    Repetition is the key to sustainable fashion. When you invest in versatile pieces and wear them often, you create a wardrobe that’s practical and timeless.

    Tips for Loving Your Wardrobe on Repeat:

    • Embrace Capsule Wardrobes: Focus on quality basics that mix and match easily.
    • Reimagine Seasonal Pieces: Layer summer dresses with turtlenecks in winter or pair cozy sweaters with shorts in spring.
    • Create a Uniform: Develop a personal style that revolves around a few signature looks.

    Why It Matters: Repeating outfits normalizes sustainable habits and reduces the pressure to constantly shop for new items.


    4. Get Creative: Upcycle and Reinvent

    Sometimes, clothes need more than a repair—they need a complete reinvention. Upcycling transforms old pieces into something fresh and exciting.

    Fun Upcycling Ideas:

    • Turn old t-shirts into tote bags or scrunchies.
    • Dye faded clothes with natural or fabric dyes to revive their color.
    • Shorten long dresses into trendy mini-dresses or turn jeans into shorts.
    • Add patches, embroidery, or fabric paint to customize your clothes.

    Why It Matters: Upcycling gives you one-of-a-kind pieces while reducing textile waste.

    Pro Tip: Host an upcycling party with friends for fun and shared creativity!


    5. Extend Care: Make Your Clothes Last Longer

    Proper care is essential for keeping your clothes looking great. Small changes in how you wash, store, and treat your clothes can make a big difference.

    Clothing Care Tips:

    • Wash Less: Washing too often can wear down fabrics. Air out clothes or spot-clean when possible.
    • Cold Water is Key: Wash in cold water to prevent fading and save energy.
    • Avoid the Dryer: Air-drying reduces wear and tear.
    • Store Properly: Fold sweaters to prevent stretching, and hang delicate fabrics with padded hangers.

    Why It Matters: Caring for your clothes reduces the need for replacements, saving money and resources.


    6. The Environmental Impact of Extending Clothing Life

    Did you know that wearing a garment just nine months longer reduces its environmental footprint by 20-30%? When you choose to rewear, repair, or upcycle instead of discarding, you help reduce textile waste, save water, and lower carbon emissions.

    Quick Stats to Remember:

    • Each year, 92 million tons of clothing waste end up in landfills.
    • The fashion industry uses more water than any other industry except agriculture.

    Your choices matter—by giving your clothes a longer life, you’re helping to create a more sustainable future.


    7. Normalize Outfit Repeating

    Social media and fast fashion have made outfit repeating feel taboo, but it’s time to change the narrative. Rocking the same piece multiple times isn’t just sustainable—it’s a sign of personal style and intentional living.

    How to Lead the Way:

    • Share outfit repeats on social media with pride.
    • Celebrate creative restyling instead of constant new purchases.
    • Encourage friends to embrace the “rewear, repair, repeat” mindset.

    Why It Matters: Shifting attitudes about outfit repeating helps reduce the demand for fast fashion.


    The Final Note: Make Every Piece Count

    Rewearing, repairing, and repeating is more than a trend—it’s a lifestyle. It’s about valuing the clothes you have, embracing your creativity, and making sustainable choices that benefit both you and the planet.

    So, next time you look at your closet, ask yourself: How can I give my clothes a longer life? The answer might surprise you—and lead to a wardrobe filled with stories, style, and sustainability.

    Because fashion isn’t just about what you wear—it’s about how you wear it.

  • Fall Fashion Forecast: 15 Trends That Will Define Your Autumn Wardrobe

    Fall Fashion Forecast: 15 Trends That Will Define Your Autumn Wardrobe

    As the crisp air rolls in and leaves turn golden, it’s time to trade your summer staples for cozy, chic fall fashion. This season, the fall 2024 fashion trends are all about bold statements, warm textures, and pieces that combine comfort with style. Whether you’re stepping into a pumpkin patch or hitting the city streets, these 15 trends will inspire your autumn wardrobe and make dressing for the season effortless and exciting.


    1. Oversized Blazers

    Structured meets slouchy with oversized blazers taking center stage this fall. Perfect for layering, these blazers add a polished edge to casual outfits.

    Style Tip: Pair with tailored trousers for a sleek look or throw it over a graphic tee and jeans for a laid-back vibe.


    2. Chunky Knits

    Nothing says autumn like a cozy, chunky knit sweater. This season’s knits come with oversized silhouettes, cable-knit textures, and earthy tones.

    Style Tip: Tuck a chunky sweater into a midi skirt and pair with boots for a cozy yet stylish ensemble.


    3. Leather Everything

    Leather is dominating fall wardrobes in unexpected ways. Think beyond jackets—leather skirts, pants, and even shirts are stealing the spotlight.

    Style Tip: Pair leather trousers with a soft knit top for a blend of edgy and cozy.


    4. Maxi Skirts

    Flowy and flattering, maxi skirts are a fall must-have. From pleated styles to satin finishes, they’re versatile and easy to style.

    Style Tip: Pair a printed maxi skirt with a fitted turtleneck and ankle boots for a balanced look.


    5. Vibrant Colors

    This fall, bold hues like cobalt blue, fiery red, and emerald green are replacing traditional autumn neutrals. Don’t be afraid to stand out!

    Style Tip: Add a pop of color with a statement coat or bright handbag to elevate a neutral outfit.


    6. Quilted Outerwear

    Quilted jackets and coats bring warmth and texture to your fall wardrobe. Whether oversized or cropped, they’re the perfect blend of style and practicality.

    Style Tip: Pair a quilted jacket with leggings and chunky boots for a casual, on-the-go look.


    7. Wide-Leg Pants

    Comfortable and chic, wide-leg pants are back in full force. In corduroy, wool, or denim, they’re the ultimate transitional piece for fall.

    Style Tip: Tuck in a fitted top or turtleneck to balance the voluminous silhouette.


    8. Plaid Patterns

    From skirts to blazers, plaid is a perennial fall favorite that’s getting a modern twist this season. Look for bold, oversized patterns in unexpected colors.

    Style Tip: Pair a plaid blazer with jeans and a simple white tee for an effortlessly cool look.


    9. Shearling Details

    Cozy shearling accents are appearing on coats, boots, and bags, adding a touch of warmth and texture to fall outfits.

    Style Tip: A shearling-lined jacket paired with distressed jeans and sneakers creates a chic, casual vibe.


    10. Statement Boots

    Boots are stepping up as the season’s standout accessory. From knee-high styles to combat boots, bold designs like metallic finishes and animal prints are trending.

    Style Tip: Pair knee-high boots with a midi dress or skirt for a balanced, fashionable look.


    11. Fringe Accents

    Fringe is making a comeback, adding playful movement to jackets, skirts, and bags. It’s a subtle nod to boho-chic vibes with a modern twist.

    Style Tip: Let a fringe jacket shine by pairing it with simple jeans and a turtleneck.


    12. Turtlenecks as Layers

    The classic turtleneck is more versatile than ever. It’s not just a standalone piece but a perfect layering essential under dresses, blazers, and shirts.

    Style Tip: Layer a turtleneck under a slip dress or jumpsuit for a chic transitional look.


    13. Matching Sets

    Co-ords continue to dominate this fall, with matching sweater and skirt sets leading the way. They’re effortless, chic, and perfect for any occasion.

    Style Tip: Add heeled ankle boots to dress up your set for a night out or sneakers for a casual day.


    14. Metallic Touches

    Metallics are no longer just for winter holidays—they’re shining brightly this fall in dresses, skirts, and accessories.

    Style Tip: Pair a metallic skirt with a cozy knit sweater for a perfect mix of glam and warmth.


    15. Oversized Scarves

    Wrap yourself in warmth with oversized scarves that double as a statement accessory. Think bold patterns, soft textures, and vibrant colors.

    Style Tip: Drape an oversized scarf over a simple coat to instantly elevate your look.


    Building Your Perfect Fall Wardrobe

    This fall is all about mixing comfort with bold style. Whether you embrace vibrant colors, cozy knits, or edgy leather, there’s something for everyone to love.

    Pro Tip: Focus on layering to transition effortlessly between chilly mornings and warmer afternoons. Invest in key pieces like an oversized blazer, a pair of wide-leg pants, and statement boots to anchor your wardrobe.

    Get ready to step out in style and make this fall your most fashionable season yet!

  • Minimalist vs. Maximalist: Finding the Balance That Works for You

    Minimalist vs. Maximalist: Finding the Balance That Works for You

    When it comes to style, décor, or even lifestyle, there’s a spectrum that stretches between two contrasting philosophies: minimalism and maximalism. Minimalism embraces simplicity, clean lines, and “less is more,” while maximalism celebrates boldness, layers, and “more is more.”

    Both approaches have their unique charm, but what if you’re drawn to elements of both? Finding the balance between minimalist and maximalist styles can help you create a look—or life—that feels authentic and uniquely you. Here’s how to navigate these two worlds and discover your perfect middle ground.


    What is Minimalism?

    Minimalism is all about stripping away the unnecessary to focus on what’s essential.

    • Key Features:
      • Neutral color palettes (whites, grays, and earth tones).
      • Clean, uncluttered spaces or styles.
      • Simple, functional pieces with purpose.
    • Why People Love It:
      • It feels calm and peaceful.
      • Reduces decision fatigue and clutter.
      • Emphasizes quality over quantity.

    Example: A minimalist living room might have a single sleek sofa, a neutral rug, and one piece of art on the wall—every element has a clear purpose.


    What is Maximalism?

    Maximalism, on the other hand, embraces abundance and self-expression. It’s about layering textures, mixing patterns, and showcasing personality through design.

    • Key Features:
      • Bold colors and eclectic patterns.
      • Layered décor or accessories.
      • Collections and sentimental pieces on display.
    • Why People Love It:
      • It’s vibrant and creative.
      • Allows for self-expression and storytelling.
      • Feels warm and inviting.

    Example: A maximalist living room might feature patterned wallpaper, colorful throw pillows, a gallery wall of art, and shelves filled with books and trinkets.


    Minimalist vs. Maximalist: Pros and Cons

    MinimalismMaximalism
    Pros: Clean, calming, timeless.Pros: Bold, expressive, dynamic.
    Cons: Can feel cold or impersonal.Cons: Can feel overwhelming.
    Best For: People seeking simplicity and clarity.Best For: People who love creative chaos.

    Finding the Balance That Works for You

    If you’re drawn to both styles, you don’t have to choose one over the other. Here’s how to strike the perfect balance:


    1. Define Your Priorities

    Think about what makes you feel most comfortable and inspired.

    • Do you prefer a calm, clutter-free environment? Lean toward minimalism.
    • Do you love vibrant, eye-catching spaces or styles? Bring in maximalist elements.

    Pro Tip: Start with one area of your life—like your wardrobe or a room in your home—and experiment with different blends.


    2. Focus on Color

    • Minimalist Approach: Stick to neutrals and muted tones for the base. Add subtle pops of color through accessories or small details.
    • Maximalist Approach: Layer bold colors and patterns but balance them with neutral furniture or walls.

    Example: A white sofa with colorful throw pillows combines minimalist structure with maximalist flair.


    3. Embrace the “Curated Maximalism” Trend

    Curated maximalism focuses on creating a maximalist look without the chaos. It’s about choosing bold pieces thoughtfully rather than filling the space indiscriminately.

    • Keep the color palette cohesive to tie the look together.
    • Choose standout items that bring personality, like an oversized artwork or a vintage chair.

    4. Use Layers Wisely

    Maximalism thrives on layers, but too many can feel overwhelming. Balance layers with clean lines.

    • Pair a minimalist base (like sleek furniture or a monochrome outfit) with layered accessories or textures.
    • Add personality with bold rugs, patterned curtains, or a mix of cushions in different fabrics.

    5. Mix Functional Minimalism with Bold Accents

    Start with a minimalist framework for function and add maximalist accents for personality.

    For Your Home:

    • Minimalist furniture (e.g., sleek coffee table) paired with a maximalist gallery wall.
    • A neutral bedroom with a bold, patterned duvet or statement lamp.

    For Your Wardrobe:

    • A simple black outfit styled with a bold patterned scarf, statement earrings, or vibrant shoes.

    6. Declutter Without Losing Personality

    Maximalist spaces can feel chaotic if they’re overly cluttered. Strike a balance by curating your collections.

    • Display only your most meaningful items or rotate décor pieces seasonally.
    • Group items like books, vases, or plants for an organized maximalist vibe.

    Pro Tip: Use trays, shelves, or containers to create “zones” for your collections.


    7. Let Your Personality Shine

    Ultimately, your style should reflect you. Whether you lean minimalist, maximalist, or somewhere in between, incorporate items, colors, and designs that feel authentic.

    Example: If you love traveling, display a few souvenirs in a clean, minimalist way—or go full maximalist with a travel-themed gallery wall.


    When Minimalist Meets Maximalist: The Perfect Harmony

    The beauty of blending these styles lies in the creative freedom it offers. It’s not about adhering to strict rules but about choosing what makes your space or wardrobe feel balanced and uniquely yours.

    • Let minimalism provide clarity and structure.
    • Let maximalism bring joy and character.
    • Together, they create a dynamic harmony that reflects both simplicity and vibrancy.

    The Takeaway

    Minimalism and maximalism are two sides of the same coin—different approaches to expressing your personality and creating spaces or looks that inspire. By blending these styles, you can enjoy the best of both worlds, whether in your home, your wardrobe, or your lifestyle.

    So, whether you’re paring down or layering up, remember: the perfect balance is the one that works for you.

  • DIY Distressed Jeans: Step-by-Step Guide to the Perfect Ripped Look

    DIY Distressed Jeans: Step-by-Step Guide to the Perfect Ripped Look

    Distressed jeans are the ultimate blend of edgy and effortless style, but buying them brand-new can cost a small fortune. The good news? You don’t need to spend big bucks for that perfectly ripped, worn-in look—you can create it yourself at home!

    Whether you want subtle frays or bold knee slashes, this step-by-step guide will help you transform any old pair of jeans into DIY distressed perfection. So, grab your tools, unleash your creativity, and let’s get ripping!


    What You’ll Need

    Before you begin, gather these essentials:

    • A pair of old jeans (light-washed or vintage styles work best)
    • Sharp scissors or a utility knife
    • Tweezers
    • Sandpaper or a pumice stone
    • Chalk or a fabric marker
    • Cardboard or a magazine (to protect the other side of your jeans)

    Step 1: Choose the Right Pair of Jeans

    Start with a pair of jeans you’re ready to transform. Distressing works best on jeans made of 100% cotton, as they’ll fray and tear naturally. Lighter washes tend to give off that vintage, lived-in vibe, but darker jeans can look sleek and modern when distressed.

    Pro Tip: If you’re nervous about experimenting, try practicing on an old pair of jeans first.


    Step 2: Plan Your Rips and Tears

    Lay your jeans flat on a table and think about where you want the rips to go. Popular areas include:

    • Knees: Large, bold tears are a statement look.
    • Thighs: Subtle frays and small slashes add texture.
    • Pockets: Distressed edges can give a vintage feel.

    Use chalk or a fabric marker to lightly outline where you want the rips and frays to be. For a natural look, avoid making the marks perfectly symmetrical—real wear-and-tear isn’t uniform.


    Step 3: Start Sanding for a Worn Look

    Before cutting, soften the fabric where you want the distressing to appear. This creates a natural worn-in effect.

    1. Place a piece of cardboard or a magazine inside the jeans to protect the back layer.
    2. Use sandpaper or a pumice stone to rub back and forth over the fabric. Focus on areas you want to look naturally faded or frayed.
    3. Keep sanding until you see small white threads and the denim begins to thin.

    Tip: Pay extra attention to the knees, thighs, and edges of the pockets for a realistic worn-out look.


    Step 4: Create Your Rips and Frays

    Now comes the fun part—creating the rips!

    1. Use sharp scissors or a utility knife to carefully cut horizontal slits across the fabric where you want the rips. Start small—you can always make the holes bigger later.
    2. To create that frayed look, use tweezers to pull out the vertical blue threads from the slits. Leave the white horizontal threads behind—these give distressed jeans their classic look.

    Pro Tip: For big, bold rips at the knees, cut two horizontal slits about 2-3 inches apart. Pull out the blue threads in between for a frayed, open-knee effect.


    Step 5: Add Finishing Touches

    Once you’ve made your rips and frays, it’s time to add the finishing touches to perfect your jeans.

    • Smaller Frays: Use scissors to scrape small sections of fabric to create tiny, distressed spots.
    • Edges and Pockets: Rough up the edges of the back pockets, cuffs, or belt loops with sandpaper for a more authentic, worn look.
    • More Texture: For added detail, rub sandpaper lightly over the seams and other areas of the jeans to create natural fading.

    Step 6: Wash and Wear

    Once you’re happy with the distressing, throw your jeans into the washing machine. Washing helps loosen any loose threads and gives the rips a softer, more natural finish.

    • Wash on a cold cycle and air dry to preserve your handiwork.
    • If needed, trim any loose or overly long threads for a cleaner look.

    Pro Tip: The more you wear and wash your jeans, the better the rips and frays will look over time!


    Styling Your DIY Distressed Jeans

    Now that your jeans are perfectly distressed, here are some ideas to style them:

    • Casual Cool: Pair your jeans with a tucked-in white tee, sneakers, and layered necklaces.
    • Street Style: Add a leather jacket, graphic tee, and combat boots for an edgy vibe.
    • Chic and Polished: Dress up your jeans with a flowy blouse, ankle boots, and a statement belt.

    Why DIY?

    Creating your own distressed jeans is about more than just saving money. It’s about making something unique that reflects your personal style. Plus, it’s sustainable—giving old jeans a second life instead of throwing them away.

    With just a little creativity and some basic tools, you’ll have a pair of ripped jeans that are one of a kind—just like you.

  • How to Turn Old T-Shirts Into Trendy Tote Bags

    How to Turn Old T-Shirts Into Trendy Tote Bags

    We all have them—those old t-shirts shoved into the back of our drawers. Maybe they’re from a concert, a sports team, or just a tee you’ve outgrown but can’t bear to throw away. What if I told you that you could upcycle those t-shirts into something stylish, practical, and eco-friendly? Enter the DIY trendy tote bag—the perfect way to give your old clothes a brand-new life while adding a unique, handmade accessory to your wardrobe.

    Best of all? You don’t need fancy tools or sewing skills—just a little creativity and a few simple steps. Ready to get started? Let’s turn those forgotten t-shirts into chic, reusable tote bags you’ll love!


    What You’ll Need

    Before we begin, gather the following supplies (you probably already have them):

    1. An old t-shirt (any size or design works—pick a fun one!)
    2. Scissors (fabric scissors work best)
    3. A ruler or measuring tape
    4. A marker or chalk (optional, for marking)

    Step 1: Choose Your T-Shirt and Lay It Flat

    Start by choosing a t-shirt you want to transform. Bright colors, bold graphics, or quirky logos make the trendiest tote bags, so get creative!

    What to Do:

    • Lay the t-shirt flat on a table or smooth surface.
    • Make sure there are no wrinkles, and align the seams so it’s even.

    Pro Tip: A larger t-shirt will create a bigger tote bag—perfect for books, groceries, or gym essentials.


    Step 2: Cut Off the Sleeves

    Next, we’ll shape the handles of your tote bag by removing the sleeves.

    What to Do:

    • Use your scissors to carefully cut off the sleeves along the seam.
    • If you want a cleaner finish, trace the curve of the seam with chalk or marker first, then cut.

    Tip: Don’t throw away the sleeves—you can use the fabric scraps for future DIY projects!


    Step 3: Cut Out the Neckline

    The neckline will become the opening of your tote bag, so make it as big or small as you’d like.

    What to Do:

    • Cut a deeper “U” shape around the neckline to widen the opening of your bag.
    • If you want a neater edge, trace the shape first with chalk or a plate as a guide.

    Tip: For a tote bag with longer handles, cut deeper into the shoulders.


    Step 4: Create the Bottom Fringe

    Now for the fun part—turning the bottom of your t-shirt into a no-sew fringe that ties together into a sturdy bag base.

    What to Do:

    1. Starting at the bottom hem of the shirt, cut vertical slits about 1 inch wide and 3-5 inches long (depending on how big your bag is). Cut through both the front and back layers of the t-shirt.
    2. Once you’re done, you’ll have a row of matching fringe strips at the bottom.

    Why It’s Cool: Not only is it easy, but the fringe adds a stylish boho vibe to your tote bag.


    Step 5: Tie the Fringe Together

    Time to seal the deal—literally!

    What to Do:

    1. Take two strips (one from the front, one from the back) and tie them together in a double knot.
    2. Repeat this process across the entire bottom until all the fringe is tied.
    3. To close any gaps, tie the knots one more time for extra security.

    Tip: Flip your bag inside out after tying if you want the fringe to be hidden on the inside.


    Step 6: Show Off Your Trendy Tote Bag!

    Congrats! You’ve just turned your old t-shirt into a stylish, reusable tote bag that’s perfect for carrying books, groceries, gym gear, or your daily essentials. Plus, you’ve helped the planet by upcycling instead of tossing your tee into the trash.


    Ways to Customize Your Tote Bag

    Want to make your bag even more unique? Here are some ideas to personalize it:

    • Add patches or pins for extra style.
    • Use fabric paint to create patterns, quotes, or colorful designs.
    • Tie-dye your bag for a trendy, artistic look.
    • Sew on buttons, beads, or lace for a vintage vibe.

    Why DIY Tote Bags Rock

    Turning old t-shirts into tote bags isn’t just fun—it’s also sustainable and practical. Here’s why it’s a win-win:

    1. Reduces Waste: You’re recycling something old and keeping it out of landfills.
    2. Saves Money: No need to buy expensive tote bags when you can make your own.
    3. One-of-a-Kind: Each bag is unique to your style and personality.
    4. Eco-Friendly: Reusable bags reduce the need for plastic bags.

    The Final Note: Turn Trash Into Treasure

    Upcycling is all about seeing potential in what you already have. That forgotten t-shirt in your closet? It’s not just a piece of fabric—it’s a canvas for creativity, a way to express your style, and a step toward helping the planet.

    So grab those scissors, pick your favorite tee, and turn it into something fabulous. Your new tote bag is waiting—and so is your next DIY adventure.

    What will you create next?

  • 10 Easy DIY Fashion Hacks to Transform Your Old Clothes

    10 Easy DIY Fashion Hacks to Transform Your Old Clothes

    Is your closet overflowing with clothes you don’t wear anymore? Instead of tossing them out, why not give them a brand-new life? With a little creativity, your old jeans, t-shirts, and dresses can become fresh, trendy pieces you’ll love to wear again.

    These 10 easy DIY fashion hacks are simple, fun, and perfect for anyone looking to upgrade their wardrobe on a budget. Grab your scissors, glue, and a splash of imagination—let’s transform your old clothes into something fabulous!


    1. Turn Old Jeans Into Stylish Shorts

    Those ripped, faded, or too-short jeans sitting in the back of your closet? Turn them into a cute pair of summer shorts!

    How to Do It:

    1. Measure and mark where you’d like to cut. Leave a little extra length if you want to roll the hem.
    2. Use sharp scissors to cut off the legs.
    3. For a distressed look, fray the edges with sandpaper or a cheese grater.
    4. Add patches, embroidery, or studs for extra flair!

    Tip: Pair your new shorts with a tucked-in tank or graphic tee for a laid-back summer vibe.


    2. Make a No-Sew Crop Top from a T-Shirt

    Too many old t-shirts? Give them a fresh, trendy twist by turning them into crop tops—no sewing required!

    How to Do It:

    1. Lay your t-shirt flat and cut straight across the bottom to your desired crop length.
    2. Cut a small slit on each side of the shirt (about 2 inches).
    3. Tie the bottom edges in small knots for a cute, finished look.

    Style Tip: Layer it over a high-waisted skirt or shorts for an effortlessly cool outfit.


    3. Add Lace to Your Old Denim Jacket

    Give a boring denim jacket a romantic twist with some pretty lace details.

    How to Do It:

    1. Choose lace fabric or old doilies.
    2. Use fabric glue or stitch the lace onto the back panel, sleeves, or pockets of the jacket.
    3. Let it dry completely, and voilà—your jacket just got a stunning upgrade!

    Style Tip: Lace details pair perfectly with dresses or edgy black jeans for a mix of soft and bold.


    4. Create a Tie-Dye Masterpiece

    Tie-dye is colorful, fun, and back in style! Turn old plain t-shirts, hoodies, or dresses into tie-dye masterpieces.

    How to Do It:

    1. Use rubber bands to tie sections of your fabric tightly.
    2. Apply fabric dye in fun colors to each section.
    3. Let the fabric sit for a few hours, rinse in cold water, and dry.

    Pro Tip: Experiment with different patterns, like spirals, stripes, or ombré effects.


    5. Upgrade Shoes with Glitter or Paint

    Old shoes can sparkle again with a little glitter or paint. It’s a simple way to give worn-out sneakers or flats a fabulous makeover.

    How to Do It:

    1. Clean the shoes thoroughly.
    2. For glitter: Apply fabric glue to the area you want to sparkle and sprinkle on glitter. Let it dry and seal with clear glue or spray.
    3. For paint: Use acrylic paint to add patterns, polka dots, or stripes.

    Style Tip: Customize your shoes to match your favorite outfits or add a splash of color to your look.


    6. Patch Up Ripped Jeans with Fun Fabrics

    Instead of tossing out ripped jeans, turn those holes into a style statement with colorful patches.

    How to Do It:

    1. Cut fun fabric pieces (like floral, plaid, or even old bandanas).
    2. Glue or sew the fabric behind the ripped areas of your jeans.
    3. Add more patches for a bold, DIY vibe.

    Style Tip: Pair patched jeans with a simple white tee to let the patches shine.


    7. Turn a Scarf Into a Chic Halter Top

    Got a scarf gathering dust? With a few folds and ties, you can create a beautiful, flowy halter top.

    How to Do It:

    1. Fold the scarf into a triangle.
    2. Tie the two ends around your neck and the bottom corner around your back.
    3. Adjust the fit to make sure it’s secure.

    Style Tip: Pair with high-waisted jeans or a maxi skirt for a beachy, boho summer look.


    8. Add a Pocket to a Plain Tee

    Breathe life into plain t-shirts by adding a colorful or patterned pocket.

    How to Do It:

    1. Cut a pocket shape from patterned fabric (like florals or stripes).
    2. Glue or sew it onto the front of the shirt.
    3. For extra fun, decorate the pocket with beads, sequins, or embroidery.

    Style Tip: A bright pocket is perfect for pairing with denim shorts or layering under an open flannel shirt.


    9. Turn an Old Sweater into Cozy Mittens

    Repurpose an old sweater into soft, cozy mittens that are perfect for winter.

    How to Do It:

    1. Place your hand on the sweater sleeve and trace an outline for the mitten shape.
    2. Cut out two pieces of fabric per mitten and stitch or glue the edges together.
    3. Flip them inside out for a clean, finished look.

    Pro Tip: Add buttons or embroidery for a cute, customized touch.


    10. Create a Statement Belt from an Old Scarf

    A beautiful scarf can double as a statement belt that elevates your outfits.

    How to Do It:

    1. Fold or roll the scarf into a long strip.
    2. Wrap it around your waist like a belt.
    3. Tie a knot or bow at the front, back, or side.

    Style Tip: Use a brightly patterned scarf to add a pop of color to a simple dress or jumpsuit.


    Transform Your Wardrobe, Transform Your Style

    DIY fashion hacks are about more than saving clothes—they’re about unleashing your creativity and turning forgotten pieces into something uniquely you. Whether you’re adding lace to a denim jacket, tie-dying a t-shirt, or cutting jeans into shorts, these simple tricks can completely transform your wardrobe.

    So, grab your scissors, fabrics, and imagination. Your closet is about to become your ultimate creative playground!

  • Glamour on a Budget: Affordable Looks for Holiday Parties

    Glamour on a Budget: Affordable Looks for Holiday Parties

    The holiday season is here—twinkling lights, festive cheer, and invitations to parties that promise unforgettable moments. Whether it’s a cozy family gathering, an office party, or a glitzy New Year’s Eve bash, you want to look your absolute best. But what if your budget doesn’t match your glamorous vision? Don’t worry—you don’t need to break the bank to shine bright this season.

    Here’s your guide to achieving glamour on a budget with affordable holiday party looks that are chic, stylish, and wallet-friendly.


    1. The Statement Little Black Dress (LBD)

    The Little Black Dress is a holiday lifesaver. Timeless and versatile, it’s easy to dress up without spending much. Look for LBDs with fun details—like sequins, lace, or velvet—that scream holiday magic.

    Style Tip:

    • Add bold accessories like sparkly earrings, a metallic clutch, or statement heels to elevate the look.
    • Red lipstick and a pair of black tights can work wonders for winter flair.

    Budget Tip: Check thrift stores or online resale platforms like Poshmark for secondhand designer LBDs at a fraction of the price.


    2. Sequins and Sparkle: Let It Shine

    Nothing says “holiday party” quite like sequins. A sequined top, skirt, or even a mini dress adds instant glamour without much effort.

    Style Tip:

    • Pair a sequined top with black jeans or faux-leather pants for a cool, chic look.
    • Keep the rest of your outfit simple—let the sequins do the talking.

    Budget Tip: Fast-fashion outlets like H&M, Zara, or discount stores often stock sparkly holiday items for under $30.


    3. Velvet Magic: Luxe Without the Price Tag

    Velvet is rich, luxurious, and perfect for winter parties. Whether it’s a velvet blazer, jumpsuit, or skater dress, this fabric adds a touch of sophistication without a hefty price.

    Style Tip:

    • Pair a velvet mini dress with sheer tights and ankle boots for an on-trend, cozy vibe.
    • A velvet blazer worn over jeans and a tank top instantly upgrades your look.

    Budget Tip: Look for velvet pieces during pre-holiday sales. Stores like Forever 21 and ASOS offer budget-friendly options.


    4. Jumpsuits: The One-and-Done Glam Look

    A tailored jumpsuit is an easy and affordable way to look polished and stylish. Opt for bold colors like emerald green, ruby red, or classic black for a festive vibe.

    Style Tip:

    • Add a glittery belt to define your waist.
    • Pair with metallic heels and simple accessories for a modern, sleek look.

    Budget Tip: Check outlets or online discount retailers like Boohoo or PrettyLittleThing for chic jumpsuits under $40.


    5. Festive Midi Skirts: Twirl in Style

    A flowy midi skirt—especially in satin or tulle—makes you feel both glamorous and comfortable. Pair it with a tucked-in sweater, sequined top, or fitted turtleneck.

    Style Tip:

    • Go monochrome for an elegant look or choose jewel tones like deep red or gold.
    • Pair with ballet flats or block heels for comfort and style.

    Budget Tip: Reimagine what’s already in your closet by pairing an old skirt with fresh accessories.


    6. Faux Fur Accessories: Cozy Chic

    Nothing feels more luxurious than faux fur, and a little goes a long way. A faux-fur stole, scarf, or jacket can instantly make any outfit party-ready.

    Style Tip:

    • Add a faux-fur jacket over a simple dress for a Hollywood-glam touch.
    • For subtle elegance, drape a fur stole over a velvet or satin dress.

    Budget Tip: Thrift stores are a treasure trove for vintage faux-fur pieces that cost next to nothing.


    7. Statement Blazers: Power and Shine

    A statement blazer in velvet, sequins, or metallic fabric adds instant polish to any outfit. Wear it over a simple top and jeans for an easy yet glamorous look.

    Style Tip:

    • Pair a bold blazer with black pants and ankle boots for a sleek look.
    • Layer it over a dress for a party-ready vibe.

    Budget Tip: Check clearance racks in stores like Mango, Uniqlo, or even department store sales for hidden gems.


    8. The Festive Satin Slip Dress

    The satin slip dress is chic, affordable, and endlessly versatile. Layer it up for colder weather while keeping its soft, glamorous glow.

    Style Tip:

    • Add a chunky knit cardigan and ankle boots for cozy elegance.
    • Throw on a faux-leather jacket with bold heels for an edgier look.

    Budget Tip: Satin dresses are budget-friendly finds in stores like Shein or discount retailers like Target.


    9. Accessories That Sparkle

    Sometimes, all you need to elevate your look are the right accessories. Statement earrings, rhinestone headbands, glittery clutches, and bold heels can transform any outfit into holiday perfection.

    Style Tip:

    • Pair your existing outfits with bold, sparkling jewelry.
    • A metallic clutch and glitter heels instantly up the glam factor.

    Budget Tip: Check thrift stores, Amazon, or holiday sales for affordable accessories.


    10. DIY Glam: Customize What You Already Own

    Who says you need to buy new clothes? Give old pieces a holiday upgrade with some DIY creativity.

    Ideas to Try:

    • Add rhinestones or pearls to an old blazer or pair of jeans.
    • Create a glittery belt or bow to transform a plain dress.
    • Sew lace or beads onto the hem of a skirt for a festive twist.

    Why It Works: DIY projects are cost-effective, unique, and fun!


    The Final Note: Style Doesn’t Need a Big Price Tag

    You don’t need designer labels or a big budget to look dazzling for holiday parties. With a little creativity, smart shopping, and a focus on timeless style, you can create head-turning looks that make you feel confident and festive.

    Because true glamour isn’t about how much you spend—it’s about how you shine in what you wear.

    So grab your sparkle, add a little flair, and get ready to celebrate in style.

  • How to Dress for a Job Interview: First Impressions That Last

    How to Dress for a Job Interview: First Impressions That Last

    They say you only get one chance to make a first impression—and nowhere is that truer than in a job interview. Before you even say “hello,” your appearance speaks for you. The right outfit can convey confidence, professionalism, and the fact that you’re the perfect fit for the job.

    Dressing for an interview doesn’t have to be stressful. With a little planning and the right tips, you can step into the room looking polished and feeling ready to conquer the opportunity. Here’s your guide to dressing for success and creating a first impression that lasts.


    1. Understand the Company Culture

    Before deciding what to wear, consider the type of company you’re interviewing with. Different workplaces have different dress codes, and matching the tone shows that you’ve done your homework.

    • Corporate Settings: Think formal and polished—business suits, blazers, and dress shoes.
    • Creative or Casual Environments: While you can dress more relaxed, always aim to look professional—think neat shirts, tailored pants, or chic dresses.
    • Startups or Tech Companies: Business casual is often the way to go—structured yet comfortable.

    Action Step: Research the company’s dress code by checking their website, social media, or asking someone familiar with their culture. When in doubt, it’s always better to overdress than underdress!


    2. Choose the Right Outfit

    For Men:

    • Formal Interviews: A tailored suit in navy, charcoal, or black paired with a crisp white or light-colored shirt and a solid or subtly patterned tie.
    • Business Casual: Dress slacks with a well-fitted button-up shirt. You can add a blazer for an extra polished look.

    Style Tip: Ensure your suit is well-pressed, and don’t forget polished shoes and a belt that matches them.

    For Women:

    • Formal Interviews: A tailored pantsuit, pencil skirt with a blazer, or a classic sheath dress in neutral tones.
    • Business Casual: Pair dress pants, a blouse, and a blazer. Midi dresses or skirts with neat silhouettes are also a great option.

    Style Tip: Opt for neutral or solid colors like black, navy, beige, or white. Avoid anything too flashy—let you be the center of attention.


    3. Pay Attention to Grooming

    The details matter when it comes to looking polished:

    • Hair: Keep your hair clean, neat, and styled in a way that doesn’t distract you or the interviewer.
    • Nails: Clean and trimmed nails show attention to detail. A neutral polish can add a touch of sophistication.
    • Shoes: Your shoes should be clean, polished, and professional. Closed-toe shoes are usually the safest choice.
    • Makeup and Accessories: Keep it minimal and professional. A watch, subtle earrings, or a simple necklace can elevate your look without overpowering it.

    Action Step: Before heading out, do a final check in the mirror for stray threads, smudges, or anything that might distract from your professional presentation.


    4. The Power of Fit and Comfort

    An ill-fitting outfit can make you feel awkward and look unprepared. Your clothes should feel as good as they look:

    • Fit: Ensure your clothes are tailored to your body shape. Loose, baggy, or overly tight outfits can leave the wrong impression.
    • Comfort: You want to feel confident and focused during your interview, not worried about itchy fabrics, tight sleeves, or slipping shoes.

    Pro Tip: Practice sitting, standing, and walking in your outfit to ensure everything looks great from every angle.


    5. Keep It Simple and Professional

    While your personality matters, interviews are not the place to take big fashion risks. Keep your look clean, professional, and distraction-free.

    • Avoid loud patterns, neon colors, or anything overly trendy.
    • Stick to one statement piece, like a watch or subtle tie, to add personal flair without overpowering your outfit.
    • Be mindful of strong perfumes or colognes—stick to a fresh and subtle scent.

    Key Rule: If you’re unsure about something, leave it out. Simplicity often speaks louder than flashiness.


    6. Prepare the Night Before

    Rushing on the day of your interview can lead to mistakes. Lay everything out the night before to ensure you’re ready to go.

    • Iron your clothes and hang them neatly.
    • Polish your shoes and set out any accessories.
    • Double-check that your outfit matches the company’s vibe.

    Action Step: Try on your full outfit ahead of time, including shoes and accessories, to spot and fix any issues.


    7. Let Confidence Be Your Best Accessory

    While your clothes matter, the way you carry yourself is just as important.

    • Stand tall, smile, and make eye contact.
    • Walk into the room with confidence—your outfit will support you, but you bring it to life.
    • Believe in yourself—because looking good is just the first step; being prepared and authentic will seal the deal.

    Final Thoughts

    Dressing for a job interview is about respect—for yourself, for the opportunity, and for the company you’re meeting. A well-chosen outfit can boost your confidence, help you stand out for the right reasons, and create a lasting impression.

    So, suit up, smile, and step into your interview ready to show them not just how great you look, but how great you truly are. After all, the best first impression comes from combining style with substance.